Must Know How To Make Residential Painting

Must Know How To Make Residential Painting

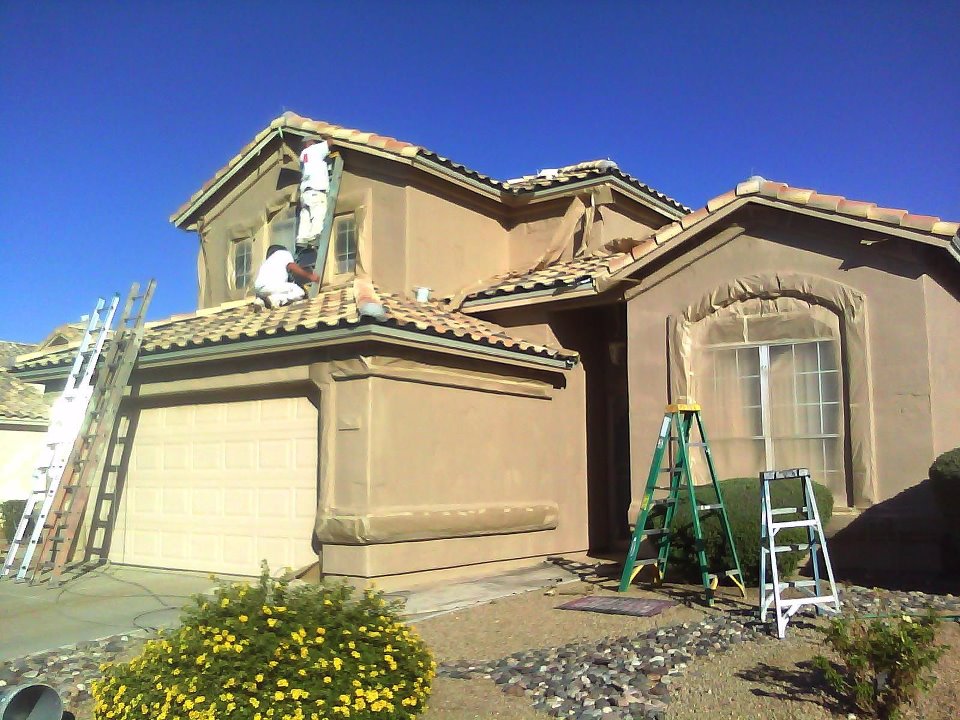
Why Should You Do Exterior Residential Painting?

Top 3 reasons to invest in house painting

You’ve finally decided to change something about your home and want to start by reviving the exterior facade with a new color. A proper house painting project will change the look of your home for better and leave a great impression on anyone that comes by. Most people have their houses re-painted simply because the old paint gets damaged by the weather with every passing year, resulting in moisture. This moisture can be disastrous for the exterior paint and cause it to crack. But, that’s only one of the reasons why you should schedule professional house painting sooner rather than later.

Increase your home’s value

It might seem unrealistic, but a nice paint job can increase the value of your home significantly. Pick the right colors that will make your house more noticeable and complement your garden seamlessly. Decide which color scheme you are going to use and stick to it. For example, if you start with a light main color, paint the whole exterior using only light colors. Don’t forget that the colors should match the environment and go well with other materials, including the roof, bricks and stones.

Improve the ambiance

Old wall colors can be disappointing and make you feel depressed. This should serve as a clear signal that you ought to do some painting and improve the ambiance around your house. It is only natural to have tacky wall colors if you are a smoker or you can’t imagine your life without pets. A new paint job can have a very refreshing effect on everyone living in your home. Also, it is excellent for promoting hygiene and overall satisfaction. Pick colors that will cause feelings of affection and warmth in your house, like green, yellow and orange.

Affordable investment with great benefits

Decorating the exterior of your home can be expensive if you pick the first house painting company you come across. Therefore, you should spend some time searching for an affordable painting service that is dedicated to offering quality paint jobs at all times. Many experienced companies are willing to provide you with the labor, materials and tools you need at an affordable price.


HOW OFTEN SHOULD YOU PAINT?

Unfortunately, there is no set timeline for all, since every home is different. There are some rough guidelines you can follow, but there are several factors that can change the timing pretty drastically. Most experts say that you’ll need to paint every five to ten years, depending on factors such as where you live, climate and weather, and the previous paint job.

Also, keep in mind that every surface will be a little different. For example:

  • Wood siding – every 3-7 years, or every 4 years if it’s stained
  • Aluminum siding – usually about 5 years
  • Stucco – typically lasts 5-6 years
  • New types of materials – these usually need to be touched up less often; for example, cement fiberboard siding can go 10-15 years before repainting
  • Brick – if it’s not painted, it only needs occasional cleaning; if it’s painted, it can last 15-20 years


Painting The House: Should You Hire a Professional?

The paint might peel, the color fades, or maybe it’s time to refresh the exterior appearance of your home. Is this a project you can do without a pro?

If you are used to doing renovations yourself, painting the exterior of your home may be a natural money-saving project. But before you start positioning the ladder, here are questions that you should review

Have you painted before?

Knowledge of painting techniques is important. People tend to overbrush, extending paint too far and not putting on a thick enough coat. Sprayers can put on a lot of paint in a hurry but require skill to use. If a house incorporates several colors, that design feature requires more skill in “cutting in,” where the colors butt up against each other.

Do you know your paint needs?

Estimating paint needs will be more difficult for a DIYer. Homeowners can use Valspar’s online paint calculator. Experts also suggest talking with knowledgeable paint retailers. They can provide advice for many painting problems or direct you to experienced pros.

Can you physically handle the job?

Being able to physically handle the job is a consideration. The mind may be willing, but painting an entire house requires a certain amount of fitness. It’s physical work and takes arm and upper body strength. Climbing up and down ladders for prep and painting also figures in.


5 Reasons You Should Invest In Professional Painting Services

When it comes to painting the exterior or interior of your home, it is recommended that you hire a professional painting company as opposed to attempting the task yourself. There are numerous benefits you can reap from hiring professional painters. It isn’t easy to paint a home on yourself, as it is a demanding and stressful job. In addition, you are prone to making mistakes that may leave the interior or exterior looking unattractive.

Below are just seven reasons you should seriously consider investing in professional painting services.

Structural Stability

A professional painter will be able to detect rot or decay within your housing structure. Even the smallest weaknesses within the structure of your home can significant affect your home over the long run. A professional can advise you on how to fix these structural defects prior to the painting process beginning.

If water or moisture enters the walls through structural weaknesses, it can result in rot or mold growth. Quality painting can help protect the structure of your home against water and moisture. A professional painter will be able to recommend a reliable construction crew to repair the structural issues that may fall outside of their expertise.

Familiarity With New, On-Trend Colors And Patterns

Deciding to paint your home gives you the chance to bring new colors or patterns into your home. By investing in professional painting services, you have the opportunity to work with someone who is familiar with how well certain colors or patterns will work in your home and with each other. A professional is capable of offering solid recommendations and advice on suitable color schemes. Also, professionals utilize back rolling or back priming in effective ways, in addition to high-quality paints that will allow the home to withstand various weather conditions and UV rays.

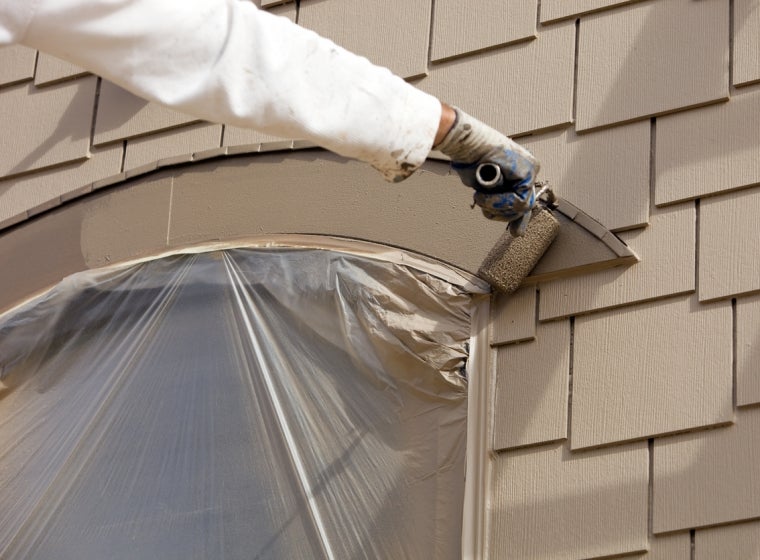
Perform Surface Preparations

It’s important that you, as a homeowner, understand that thorough preparations are necessary for a painting project to be successful. These preparations include carpentry work, rot repairs, sanding, patching, and more. This process ensures that the painting lasts longer and looks higher quality once complete.

Timely Completion

A painting company has a team of painters who work together to ensure that your project is completed within a predetermined timeframe. In the end, you will have more time on your hands to focus on designs, decorations, and other things. If you were to do the paint job yourself, you may be painting for weeks or months. However, with professionals, if you let them know when you want the job completed, they can generally have it done within that timeframe. Delays can happen, but they are generally due to the need for major repairs like rot or decay. Regardless, most professionals can work within a set timeline, allowing you to return your normal routine.

Cleanliness And Longevity

A thorough paint project consists of implementing a number of containment strategies. A professional will make certain that there are no messy flakes, chips, or debris. An adequate paint job can hold up for years, but the type of longevity requires a solid paint job from the get-go as well as essential steps to be taken to ensure the desired results are achieved—and only a professional painting service has the ability and resources to ensure that your dream can truly be realized.


Things You Must Know When Painting a House Exterior

Consider Mother Nature

Plan ahead when painting. The time of year is key, so understand your local weather patterns. Select a dry time of year when there is little rain and lower humidity. Paint needs time to dry and will not adhere to surfaces that are not dry.

Quality Over Price

Better quality paint means you will paint fewer times over the years, and you’ll get better coverage when you do paint. Paint technology has improved dramatically in the past few years, with colors guaranteed to last longer than ever before. You may be tempted to skimp on paint to save money up front with a cheaper brand, but you’re bound to have trouble and eventually pay more in the long run.

Paint Doesn’t Stick to Rotten Siding

Rotten wood and siding material are nearly worthless to paint, as they will do nothing but to continue to deteriorate. You have a couple of options. Replace the siding or wood trim with new components, or in the case of small areas, use a wood hardener and match with an exterior filler product, such as a wood filler. Be sure to prep and sand either one prior to painting.

Use Primer

The rule of thumb has always been to apply a good coat of primer, sand, then apply your color coats. This is still a good rule to follow, but new paint technologies have combined primer and paint into one product, which manufacturers assert will cut down on the number of coats you will have to apply. This newer paint is more expensive, but may be comparable to the purchase of separate primer and paint. Look at reviews of these newer paints, particular from folks that have used it in your area.

Seal It Off

Properly close your paint containers with their lids after you finish for the day to keep the paint from drying out. Use a rubber mallet to lightly hammer the lid shut. You can also add a plastic wrap film over the opening to ensure a tight seal.

Must Know About Trenchless Pipe Replace

Must Know About Trenchless Pipe Replace

Signs That Indicate You Need Trenchless Pipe Repair For Your Ottawa Home

Pipe Bursting

Pipe bursting is best if there is a lot of damage over large stretches of the sewer line. This method is less intrusive than traditional techniques because it only involves having 2 holes dug for repairs rather than having a large section of your yard dug up. The holes are dug across the entire length of the damaged area of the pipe.

Pipe Bursting Benefits

The benefit of using pipe bursting is that only two incision points are required, and the repairs made are made to last. With this method, your new pipe or pipe liner will end up being more durable than the old pipe. The new pipes are also code-compliant and the material they are made out of is chemical-resistant.

Pipe Relining Method

This method is typically done by digging one hole, inserting a lining material and balloon into the existing pipe. This coats the interior of the pipe, hardening on the inside. This creates a new pipe inside the old one.

Pipe Relining Benefits

This method is great because it involves the least amount of damage done to the yard with only one hole being dug. This is a much superior alternative to traditional trenching because its quicker, less disruptive, cheaper, and is much safer for you and your family as well as the technicians.

Typical Cost for Repair

The cost is going to vary for a job like this, so it’s best to speak to a professional company that knows what they’re doing. The cost of a trenchless pipe repair is $80-$250 per foot. The average is approximately $160 per foot. With traditional trenching the typical budget on private property is between $8,000.00 and $12,000.00 can cost up to $20,000, making these newer methods a much more cost-effective way to fix your lines.


Is Trenchless Pipe Repair Always the Best Solution?

Yes, going trenchless is the best choice

Normally, offering such a blanket answer might seem foolish. But we’ve been in the business for a long time and know the benefits of choosing trenchless technology for pipe repair. The alternative to trenchless is the old-fashioned method of digging up the ground to reach the buried sewer or water line to fix or replace it. Trenchless offers so many advantages compared to the old techniques that there’s little question which one is the best

Trenchless doesn’t mean only one technique

There ­are choices involved when it comes to trenchless repair services. Most of them you can leave up to the professionals handling the job. Before starting the repairs, the trenchless experts will inspect the pipe to find out the extent and type of damage so they’ll know the best way to fix it. These inspections are also part of trenchless technology: push-cams inserted into the pipeline which send back images to monitors where technicians can observe the pipe interior. Using these push-cams eliminates an enormous amount of guesswork and saves time—the technicians know exactly what type of work they need to do, where to do it, and how to do it

Once the inspections are complete, the technicians will decide on whether the best way to fix the pipe is pipelining or pipe bursting. Pipelining fixes a leaking or decaying pipe from the inside by sliding a liner into the pipe and setting it in place. Pipe bursting involves slipping a new pipe into the old one, then expanding it to shatter the old pipe and replace it.


Pipe and Sewer Drain Replacement

Stumped as to why your drains aren’t in good shape in your residential or commercial property? There could be many factors that contribute to your recurring sewer line issues. Even the most well-maintained systems are subject to develop faults as decades old materials eventually break down or perform less efficiently over time. When this happens, you’d want to consider having a new drain line replacement to get the issue over with in the soonest possible time.

DIY Sewer and Pipe Drain Replacement

Cut the section of the pipe you wish to replace. Have your assistant hold the pipe as you do the cutting. Cast iron pipes will need specialized equipment in the form of a cast iron snapping tool. Sewer drain pipes made of plastic or copper can be cut using a hacksaw. Steel pipes are best cut using an electric saber saw. Even out the edges for a smooth fit.

Replace with a new pipe according to the exact length and dimension as the old pipe. Install rubber connecting couplings on the open holes of your existing pipe structure. Slide them down so they connect the sections where the new pipe and the existing pipe system firmly and securely.

Clean the drain pipe with a fine grit sandpaper before installation. Apply glue to the top interior part of the coupler. Sewer drains will have to slant downwards to where you wish to have sewage flow.

Better Leave it to the Professionals

We wish there was a simple way to replace your sewer pipes. That is why you are better off hiring a licensed professional technician to ensure the right process and steps are observed. Some possible problems that could arise in an improper installation are leaking and inefficient drainage.  It could also be the cause of an even more catastrophic event that could put you in great inconvenience


How Affordable is Trenchless Pipe Lining Compared to Other Repairs?

Traditional, dig-and-replace pipe repair

$50-250 per foot, resulting in roughly $3,000-$6,000 for small jobs, and $5,000-$13,000 for repairs over 50 feet. Any additional landscaping, road closure, and labor will contribute a great deal to cost

Trenchless pipe bursting

One of the most common dig-free pipe renovation techniques, pipe bursting costs roughly $60-200 per foot, resulting in $3,500-$20,000 for an entire repair. Bursting is essentially underground pipe replacement, and cost depends on the length and depth of your existing, damaged pipe. Using a cone-shaped bursting head, trenchless experts can typically replace an entire pipe in a single day.

Trenchless pipe lining

Relining your damaged lateral or sewer pipe will typically cost $80-250 per foot, with an average of around $160 per foot. For standard sewer lines, repair costs can vary between $4,000 and $20,000, depending on circumstance. In most cases, homeowners pay between $6,000 and $12,000 to repair critical sewer connections

Small-scale pipe lining applications

For broken pipes below 50 feet in length, lining can typically be completed for around $3,000-$4,000, again depending on the location and depth of the pipe.


How Affordable is Trenchless Pipe Repair Vs Traditional Repair?

If there’s one problem that every homeowner dreads, it’s the prospect of discovering faulty or damaged pipes somewhere on their property. Whether it’s a water or sewer line, broken pipes can cause a number of problems if they’re left unattended for too long. Traditionally, the digging required to repair or replace these pipes was a major undertaking that could last for several days and inflict significant property damage. Today, however, trenchless technology allows experienced plumbing contractors to do the same work in a fraction of the time with minimal digging.

The Upfront Costs of Trenchless Vs Traditional Pipe Repair

On paper, traditional sewer pipe repair solutions are slightly less expensive than trenchless repair solutions. As this method of pipe replacement is more common, homeowners typically have many contractors to choose from

Lateral Pipe Lining

Sometimes called cured-in-place piping (CIPP), this technology uses existing pipe, adding a layer of epoxy resin to re-line the pipe, repairing cracks and closing gaps to prevent leakage and soil intrusion—basically creating a new pipe within the existing pipe. Costs for lateral pipe lining can range from $80 to $250 per foot.

Pipe Bursting

This technique uses a pneumatic or hydraulic head that destroys the old, broken pipe and drags in a new pipe to replace it. Pipe bursting tends to be a bit less expensive than lateral pipe lining, with costs ranging between $60 and $200 per foot of pipe replaced.

Hidden Costs of Traditional Pipe Repair Vs Trenchless Repair

There are a number of additional costs to consider when making repairs to a pipe that the sticker prices listed above simply don’t cover. For example, traditional trenching repairs don’t always include the cost of excavating the old pipe. Trenching can cost anywhere between $4 and $12 per foot; if the job is especially complicated, it may even require another contractor to perform the work. Also, if any large, heavy objects are located over the sewer pipes, there may be separate charges for relocating them before and after work is completed

Learn More About Vacation Rentals Cleaning For Better Vacation

Learn More About Vacation Rentals Cleaning For Better Vacation

Fast & Efficient Vacation Rental Cleaning Tips

Keeping a spotless vacation rental is important to impress your guests. As a vacation rental host, you want to be sure you are properly cleaning and presenting your home in the best possible light. Here are some helpful fast and efficient cleaning tips for your vacation rental.

  1. Make a checklist

Whether you are doing the cleaning or hired a cleaner to clean your vacation rental, making a checklist ahead of time is very beneficial. With your busy schedule, it is easy to forget to take care of some important tasks for cleaning. Making a set checklist for your cleanings will solve this issue. If you have hired a vacation rental cleaner then a checklist is very important so that the cleaner knows exactly what you would like done for your property.

  1. Set time limit per room

Setting a time limit for cleaning each room of your house is a good way to ensure a fast cleaning process. You can base the time spent on each room based on what you have on your cleaning checklist for each room.

  1. First, start high!

A smart place to start is with tall pieces of furniture. This way when you dust tall furniture, the dust does not dirty your previously cleaned floor.

  1. Vacuum

When it comes to dusting tops of drawers and dressers: We recommend you do this step before you vacuum, this way you can vacuum any dust. The cleaning tasks you wish to be completed in your home can be compiled on a checklist for your cleaner on TurnoverBnB. Vacuuming does not take long but it is an important task to complete after each guest.

  1. Carry your cleaning caddy

While you are cleaning each room, carry around your cleaning caddy! This is a simple way to save time having to stop cleaning to retrieve different cleaning products. Having all of the products you need with you at once will save you this time and prove to be a good way to make for a fast and efficient Airbnb cleaning.

  1. Ice cubes to remove wrinkles

A quick fix for wrinkled sheets is ice cubes and some heat. By putting sheets in the microwave with ice cubes for about 5 minutes, you will have perfectly steamed linens.

  1. Tell Airbnb cleaners to follow checklist

If you yourself are not completing the cleaning and you hire an Airbnb cleaner, make sure the cleaner knows to follow your checklist or of any time constraints. Find your perfect Airbnb cleaner on the TurnoverBnB marketplace!


WHAT MAKES A VACATION RENTAL CLEANING DIFFERENT

A vacation rental cleaning goes above and beyond what you’d expect from a typical house cleaning. Your housekeeper needs to be ready to provide a higher level of service, and handle tasks like: test

  • Cleaning the linens that were used by previous guests
  • Sanitizing surfaces after previous guests check out
  • Checking that the next guest has sufficient quantities of toilet paper and cleaning products
  • Keeping an eye out for damage
  • Checking for missing items and taking pictures of any damage
  • Testing various items in the house to be sure they work

In other words, your housekeeping service isn’t only cleaning. It’s also going to make your home guest-ready


Establishing standards for cleaning

Good, bad, or otherwise – guests know exactly what to expect when booking with brands on both ends of the spectrum, from Hilton and Hyatt, to Motel 6 and TravelLodge. You are a brand as well, whether you manage one home or 1,000, and that brand should carry a standard, too! What can your guests always expect, without fail, when they book a stay with you?

If you want to guarantee the crispest linens and sparkling silver – say so, and commit to it. Your guidelines should address regular, and seasonal or periodic, procedures.

Your brand standard sets the bar for what you consider acceptable…while still always aiming to over-achieve. But keep it realistic. Don’t promise to slap up a fresh paint job between each stay when this is certainly not a task you can accomplish in the typical window of a couple hours between back-to-back guests.

Even if you’re not seeing bookended bookings now, you have to prepare for the scenario and give your cleaners a reasonable task list to meet in the allotted time. In the interest of accountability and transparency, detail your standards clearly for your staff and your guests, including specific expectations for a presentable, rent-ready home.


How to simplify cleaning in your vacation rental house

Everyone is looking to keep their vacation rental cleaner and more inviting but without putting in too much time and effort.

How can you do so?

Here are a few tips that simplify the cleaning and maintenance process of your home while still ensuring that the house is as clean as possible.

  • When the house is not being used, cover furniture with sheets or special furniture covers to eliminate excessive dust
  • Store mats and area rugs where they won’t get dusty or stained
  • Have pest control add a barrier around your home so bugs and spiders won’t take over the unused property
  • Remove all food from the house that could attract mice or other uninvited guests
  • Keep lawn/patio furniture indoors and covered to protect it from the elements


Think like a hospitality professional

If you don’t have a background in the hospitality industry, it can be a switch to think like a professional hotelier instead of a homeowner who’s letting guests have temporary use of your property. But once you make the switch to paying guests, you also have to switch to that hospitality mindset. Think about when you’ve stayed at hotels. What made an impression on you or convinced you to choose one property over another? Then, figure out cost-effective ways to duplicate those aesthetic or experiential extras for your guests.

Use Kitchen Remodelling Metode To Remake Your Kitchen

Use Kitchen Remodelling Metode To Remake Your Kitchen

Hiring the Right Kitchen Remodeling Designer

Why Hire a Kitchen Designer

Designing a kitchen involves choosing materials and appliances; determining a layout; working through plumbing and electrical configurations; and so much more. A professional kitchen designer can help put all of these pieces together so you get the kitchen of your dreams.

The most important step in a successful kitchen project is selecting the right people to work on the job. Because much kitchen work is structural, it’s essential — for legal and insurance reasons — that the work be performed according to the building codes of your area. And to be sure all work is done appropriately, you’ll want to hire professionals for every aspect of the job in which you are not personally an expert.

For any structural work, you’ll need a licensed architect or design/construction firm. You’ll also want to use licensed contractors and skilled tradespeople, and you may want the specific expertise and creativity of a certified kitchen designer (CKD) or an interior designer with a lot of kitchen design experience. Whomever you hire, you’ll rely on their expertise to guide you through technical issues, and you’ll count on their integrity in working within your budget. What’s more, your experts and their crews will be in your home and around your family for the life of the project. So make sure they really deserve your trust!


Find a Certified Kitchen Remodeling Designer

You need to observe the credentials of a kitchen designer before hiring them to redo your kitchen. An accredited kitchen remodeling designer, including an interior decorator, should have passed any tests conducted by an organization like the NKBA (National Kitchen and Bath Association). With a qualification like this under their belt, the designer is abreast with trends, the latest technology. You can search online for reputed designing companies or individual contractors. The kitchen designer, if requested, ought to be in a position to provide you references for previously completed jobs.


Estimate How Much Time it Will Take to Remodel the Kitchen

Kitchen remodeling takes effort and time, as meticulous information need to be taken care of. Before the project begins, you should examine the time frame with your contractor that it is going to take to give your kitchen the appearance it needs. An efficient kitchen remodeler will coordinate with all the contractors necessary to complete the project- like an electrician or appliance firm – well. This will allow them to finish the project in a timely fashion and to remain on schedule. find out more here about kitchen remodelling!


You Should Discuss Every Financial Detail of the Renovation

People always fear to remodel their kitchens due to the unbearable costs that may be incurred. Nonetheless, one can realize the worth of the investment made by hiring a professional and skilled designer. A proficient kitchen designer will provide excellent ideas, amenities, and resources that perfectly fit your budget. They will correctly analyze your cooking style, space, frequency in socializing as well as the lighting effects in your kitchen and then advise accordingly.

A skilled kitchen designer will emphasize on proper ventilation and lighting effects of the kitchen. The designer will also look into storage capacity, plumbing, sanitation, appliances, electrical and cabinetry details with excellence. In most cases, a proficient kitchen designer will provide expert suggestion to the customer. He will ascertain that the kitchen will be correctly functional before embarking on the project.

Define Your Requirements

The kitchen belongs to you, and thus you must talk out your mind and give your requirements and thoughts. Also, ensure that the kitchen designer is willing and able to deliver your wants. He should be able to achieve the type of color scheme you need, the relevant amenities required and the floorings you want.


Paying for a Kitchen Designer

Fees for a high-end kitchen designer can represent 8% to 10% of your project costs. The lower figure generally applies to more expensive projects—those costing $127,000 or more. The national average for kitchen design services is $12,250, with the minimum range for an independent designer running from $1,500 to $3,000.

FINANCING TIP: If hiring a kitchen designer put you over-budget, you could consider a fixed-rate personal loan to cover the costs, ensuring you get the resources you need to have your project done right. Discover Personal Loans is an appealing lender because they let you apply for an amount you choose up to $35,000 as well as from five repayment options. They also don’t charge any origination or pre-payment fees and there’s no collateral is needed to secure the loan.

Regardless of how your designer charges, be sure you know what services are included in the fee. If all you want is a few ideas and some direction, some designers will offer a consultation at a cost of a few hundred dollars.

Tips To Find Good Divorce Lawyer

Tips To Find Good Divorce Lawyer

What to Look For in a Divorce Lawyer How to Choose Wisely

You need to know your rights, tasks and responsibilities under the law. Just a attorney who has been maintained to represent your pursuits can encourage you. How can you really examine financial agreements in splitting up and divorcing, if you don’t understand what your rights, jobs and responsibilities are? Not knowing what your rights are can result in maybe not getting the fair share of resources, your fair share of support or your great amount of time with your children.

The earlier you obtain a attorney, the sooner you’ll learn what you need to know to safeguard your self (and your children and house interests). Occasionally people do not know how exactly to begin identifying the issues they should examine, even when the separation is an amicable one and the events anticipate a “pleasant divorce.” A great, experienced divorce lawyer can support you in determining the difficulties you will need to discuss with your spouse to attain a comprehensive deal and world wide settlement. Over time there has been numerous occasions when we managed to point out to customers places they’d initially ignored and problems which should be included in their settlement discussions, such as living insurance, health insurance, and children’s educational needs.


How do you go about finding a good divorce lawyer? Here are a few recommendations:

Ask an Attorney

If you understand a lawyer, ask him/her for a recommendation to a good divorce lawyer. She or he will most likely know somebody or several someones who dedicate a considerable portion of the practice of law to separation and divorce and associated issues. I have been handling separation and divorce for 30 years and have an excellent reputation among the local legal community. Any divorce attorney worth his/her salt ought to have developed a credibility among other legal representatives. Lawyers usually understand who is good for a particular kind of case; they certainly know who they would see, if they were facing separation and divorce.


Self-Confidence

If your guesswork is accurate on the above research, most possibly you can evaluate that out of his/her sparking eyes, smart understanding of things, and confidence level. It’s no mandatory that a good student should be a first-rate educator and equally all JD’s don’t get same level of recognition in the industry. Given that, lots of divorce disputes appear with extremely cunning issues and dealing with them is not everyone’s cup of tea. While sharing the elements related to your custody issue, alimony, child support or property dispute, check how self-assured you attorney looks like. Their confidence level could be well readable out of how they speak, behave, and react.

Expertise to Case-building

Regardless of you agree to undergo a mediate or two-way divorce process or it’s likely to knock the door of courtroom clash, techniques of case building is most worthy weapon of top divorce lawyers in The Woodlands that help them thrive in negotiation or courtroom practices. Specially, in course of litigation, when you spouse or ex is well-prepared with his/her own lawyer, it’s the technical expertise, procedural experience, and vision power that help them to construct unbeatable strategies.


Going to court about family law unless it is compulsory

is like using a sledgehammer on a flea problem; you may kill a few fleas, but you wreak much damage to the structure of the house, too. When individuals settle their cases outside of court, they can be a lot more creative than the court would be in fashioning a remedy that is fair to both parties. Sometimes, an agreement is not possible. When that is the case, you want an experienced, able divorce attorney who can advocate for your position in court and has a proven track record of success.


Choose a divorce lawyer you trust.

Throughout the divorce process, you will need to share private and sensitive information with your divorce attorney – the good, the bad, and the ugly. Your attorney must know everything that the other party may use against you. Bad facts are easier to manage if your attorney is made aware of them early on. Your attorney will also have a different perspective than you on whether certain facts are legally relevant or not. You must be able to trust your attorney and be comfortable opening up to them. With that in mind, remember that your attorney is not your best friend or your therapist; your attorney is there to “counsel” you by providing legal advice. If your attorney inserts him/herself too much into your life, their ability to provide objective, sound advice about your case can be compromised. The best attorneys are those who are able to maintain a caring distance, to be empathetic yet objective.

Go with your “gut” – finding the right “fit” is a must in the attorney-client relationship.

Not every family law attorney will be the right fit for you, even the ones who coming highly recommended. If you value an attorney who can hold your hand throughout the process and educate you about each and every development throughout your case, be cautious of attorneys with too high of a caseload who may not have the time or support to be in communication with you. If you need an attorney to assist with the division of interests in a closely-held family business, you will need an attorney with a business background, or at the very least an attorney with a strong network of reliable financial consultants. Not all family law attorneys have the knowledge or skillset to handle high asset divorce cases. Likewise, not all family law attorneys are proficient at handling contentious custody matters or allegations of domestic violence or abuse and neglect. Don’t be afraid to ask your attorney if they’ve handled a case like yours. At the end of the day, you are your best advocate and you must follow your instincts when choosing an attorney to advocate on your behalf.

Must Know Tips To Prepare Something Before Long Distance Moving

Must Know Tips To Prepare Something Before Long Distance Moving

Tips for Simplifying A Long Distance Move

A LONG DISTANCE MOVE IS A BIG JOB.

Taking the time to plan your move carefully will help you avoid pitfalls along the way. You need to take the differences between a local move and a long-distance move into account during the pre-moving process. Whether you’re planning your first ever long distance move, or simply need to ensure your next goes off as planned. These tricks of the trade will help make your upcoming long-distance move smoother.

PACK YOUR BELONGINGS FOR A LONG HAUL.

During a long distance move, items will be handled by multiple teams of workers and riding in a truck across a large stretch of miles and a long period of time. Make sure that everything you pack is well cushioned inside the box. Try to assure that each box is packed to the top and that nothing is loose. Containers inside boxes should be well sealed, taking into account your boxes may be turned on their side or even upside down at some point.  This also means you’ll need to buyhi-quality moving boxes instead of used gas station boxes or other low-grade alternatives. If you wouldn’t pack a certain way for long term storage, don’t pack that way for a long distance move.


Color code boxes and furniture.

Buy different colored packing tape, and in addition to clearly labeling each box with a marker, designate a color for each room in your new home (keep this legend in your move binder and give a copy to your movers). Red for the master bedroom, for example, green for the kitchen and yellow for the bathroom. This makes it easy for you and the movers to quickly determine what box goes where in your new space.

Create a detailed packing inventory.

Create a separate log for each room. As you pack each box, assign it a number (like Master Bedroom #1) and create a list of what’s inside each. You don’t have to get down to the nitty gritty detail, but do be specific enough that someone who doesn’t know what’s inside will have a good idea what to do with them. For example: Small Kitchen Appliances (coffee maker, immersion blender, spiralizer, coffee grinder) or Guest Bathroom Linens (shower curtain, rug, cream towel set and sink accessories).


Save money on your long distance move

Considering that the average cost of a long distance move is around $4,300 (move distance: 1,225 miles; shipment weight: 7,400 lbs.), you must do everything in your power to reduce your moving expenses.

To save money on your long distance move should be your top priority!

  • FIND affordable cross-country movers by requesting free long distance moving quotes and comparing their moving rates and services.
  • REDUCE the number of items you’re moving to a minimum – no need to pay for the transportation of things you’ll never use again.
  • PACK UP your things on your own to save from not having to pay professional packers. Ask friends to help you pack if you’re running short on time.

Change your home utilities

It’s important to know how to plan a long distance move in order to avoid problems – unpacking in the dark, for instance – when you arrive in the new house or apartment.

That’s right, you’ll definitely want to change your home utilities before moving out.

  • THINK about whether you’ll need all of the utilities you’re enjoying at the moment – electricity, water and sewage, gas, Internet, cable TV, telephone, waste removal, etc.
  • CONTACT your utility companies to arrange for the disconnection of your current utilities. Do it roughly 3 weeks prior to your move-out date.
  • GET IN TOUCH with the new utility providers in the destination town or city and schedule the timely activation of your new-home utilities.


Hire professional movers.

Hiring professional movers often ensures the most high-quality move. Professional movers will load your belongings carefully, drive the truck across town, and unload items in the appropriate room in your new home. Full-service movers are able to provide things to make the move go smoothly that you may overlook. They can secure necessary parking permits, are equipped with gear such as furniture pads and dollies to protect your items and make transporting them simpler, and can disassemble and reassemble your furniture so you do not have to yourself.

The costs of moving add up, but there are some ways you can cut corners to help the cross-country move be as affordable as possible.  Do some work on the front end to eliminate moving extra items you don’t really need, be prepared so you spend less cash on food and drinks on the drive, and let movers take care of the rest.


More tips for moving out-of-state with a trailer

  • Make sure everything is secure to avoid shifting and sliding.
  • Choose gas stations that are easy to pull your trailer through.
  • Practice backing up and making wider turns to avoid accidents.
  • Make sure to get optional insurance to cover any damage.
  • Slow down over speed bumps and curbs.
  • Secure the door with a pad-lock to deter thieves.
  • Think about temperature-sensitive items before you leave.
    • Winter – Liquid items stored back there can freeze easily.
    • Summer – Items can melt or com-bust under excessive heat.

Take some time to think it over, and choose the option that best fits your needs and your budget.

Choose The Right Way To Make A Water Testing

Choose The Right Way To Make A Water Testing

HOW TO TEST YOUR WATER FOR HARMFUL CHEMICALS

What Are You Testing For?

You should perform a water test at least once a year. You’ll be looking for the two most common forms of water contaminants: coliform bacteria, and nitrates. However, it is also important to test for bacteria, lead, pesticides, chlorine, hardness, and pH. Keep in mind, your water will never be perfectly clean. But, there are certain levels of contaminants approved by the EPA that will not have adverse effects on your health. For example, lead is usually found in water but at such low levels that it does not pose a health risk.

Health Risks

There are many health risks associated with contaminated water. These include, rashes, stomach or liver illness, respiratory problems, neurological effects, reproductive and development problems and in severe cases cancer. The health effects are broken down into acute effects and chronic effects. Acute effects occur quickly, usually within hours after ingesting the contaminant. Usually, these don’t cause long-term issues and your body can typically fight off the infection. Chronic effects occur when the contaminant has been ingested over a prolonged period. Thus, allowing your body to be gradually weakened over time. Even if you think the water you drink is fine, it is best to test yearly to be sure.

Ask Your Water Company

The first place you should start is with your local water company. Most water companies are required to test the water for you. Water companies are required to provide Consumer Confidence Reports to the United States Environmental Protection Agency (EPA). The report is an in-depth analysis of everything in your water. It includes all contaminants that may be in your water along with the health risks associated with them. This is the most straightforward and comprehensive approach since the report provided is EPA approved and touches on more than the standardized tests.

Get Your Water Professionally Tested

Many people prefer to have a professional test their water. If you’d rather get your water professionally tested, visit a local lab that specializes in water contaminants. This is a great way to test for specific contaminants. If you or someone in your household is pregnant or expecting this is a great idea. You can visit National Testing Laboratories for customized water testing services. This includes testing for residences, commercial sites, and bottled water. Visit the EPAs Safe Drinking Water Hotline to be referred to the best local water testing agency, or the Water Quality Association site for approved testing companies. There are plenty of resources available online to help you find the best professional.

Test It Yourself

If you prefer, water test kits are available online and in store. Testing yourself is a quick, easy way to determine if your water is safe. If you notice anything unusual about your water like an odd smell, discoloration, or an abnormal taste. These test kits typically come with several strips containing reactants, and change color when a contaminant is present. Kits are around $15 and are an affordable and simple way to figure out what might be hiding in your water. However, it is important to keep in mind that home kits are less reliable. Typically they test for fewer contaminants than getting it done professionally.


Can You Trust Home Water Test Kits?

How I Tested the Water Test Kits

The water at my house comes from a 185 foot deep drilled well. It’s cold and clear and tastes fantastic.

When my husband and I bought the house a few years ago, we were told that the water was fine. But we never had it tested ourselves. It was always in the back of my mind that I really should get it checked, just to be sure. Finally, a few weeks ago, I ordered six different water test kits from Amazon. I decided to go with kits that are well known and that are affordable for most people. Then I scheduled an appointment with a guy from the well company to come out and do some testing. He spent about an hour collecting samples and then sent them off to Nelson Analytical Lab in Manchester, New Hampshire for analysis.

How the results compare to the professional lab analysis:

Mostly it agreed where they tested the same things. However, I would not trust this for testing fluoride if that’s a concern for you. The JNW Direct test detected no fluoride in my water, but the professional test measured fluoride at 1.6 ppm. That’s a significant discrepancy. In addition, the JNW Direct test detected no iron, but the professional test detected iron at 0.062 ppm. The hardness was off a bit, too.


Easy ways to test your water

Check with Your City

Each year by July 1, you should receive a short consumer confidence report or drinking water quality report in the mail or online notification from your water supplier. The report tells you where your water comes from and what’s in it, and some reports include your water hardness. If yours doesn’t, you can call your local water municipality, and they should be able to tell you.

Quick In-Home Testing

Without having to go too far out of your way, one of the easiest options for a hard water test is with a clear, clean, empty bottle with a cap, pure liquid soap and water right from your tap. Fill the bottle one-third full, add a few drops of pure liquid soap and shake vigorously for a few seconds. If there is a distinct lack of fluffy bubbles and the water appears cloudy and/or milky, your water is hard. Soft water would have copious bubbles, and the resting water at the bottom of the bottle would be clear. Keep in mind that because most soaps are formulated with detergents, they lather regardless of your water type. For the best results, use a basic soap, such as Castile, which is free of dyes, perfumes and detergents.

Advanced Testing Methods

After filling a glass with cold water from your bathroom sink, insert the test strip for several seconds and then remove it. Also, it’s important to note that you should not just stick the strip under running water, as this can provide inaccurate results. As the strip changes color, compare it to the color chart included in your kit. Each color on the chart corresponds to the hardness of your water, with results measured in grains per gallon (gpg).

What’s Your Number?

With over 85% of all households experiencing some degree of hard water, knowing your “number” will let you see where your hardness stacks up. Once you’ve tested your water with a strip or kit, the next step is to use your “number” to see just how hard your water is. The average hardness in the U.S. is about 13 grains, which is considered “very hard.” Anything over 14 grains is deemed “extremely hard.” Even if you don’t live in the high hard water zones, a household starts seeing the effects of hard water at around 7 grains of hardness.


Ways to Find Out If Your Drinking Water Is Safe

Check With Your Water Company

You know that bill you pay every month, or every quarter, for your drinking water? It’s the first stepping-stone on your search. Every year, your water agency is required by the United States Environmental Protection Agency to supply you with a Consumer Confidence Report, which is an annual water quality report that details any and all contaminants that may be present in your water and alerts you to the health risks they pose.

Search the Environmental Working Group’s National Drinking Water Database

This watchdog agency maintains a handy-dandy (and easier to use) database of water quality reports, searchable by zip code and by water company. At first glance, the results can be scary. That’s because the EWG highlights chemicals that are found to be above what it terms the “health limit” in addition to those that exceed the legal limit for safe water. The EWG’s data also includes many chemicals that aren’t regulated—meaning chemicals for which the EPA has not set legal limits. For these chemicals, it uses zero as the baseline, so water that contains any amount of the chemicals is flagged.

Use the EPA’s Drinking Water Watch Program

Eighteen states participate in the EPA’s Drinking Water Watch program, which links to a searchable database of detailed information on water quality violations, reported health hazards, and actions taken by the state to enforce water quality or clean up pollution.

Research Specific Contaminants

Once you have your water quality data, you can go a step further and look up each chemical of concern in EWG’s chemical database or in the EPA’s list of water contaminants. The Water Quality Association (a business association for the water treatment industry) has interesting information on emerging contaminants, but don’t get too worked up—the association represents companies that make money from water testing, so it has a vested interest in making you anxious.

If Your Water Comes From a Well…

When your water supply comes from a private or a community well as opposed to a municipal agency, you’ve got to do a little extra digging, as it were. The EPA has a comprehensive state-by-state guide to private drinking-water wells across the country, but once again, it’s ridiculously inconsistent. If the link for your state doesn’t take you to a helpful page, contact your state government directly to see if it has more up-to-date information.


How to Interpret a Water Analysis Report

Features of a Sample Report

Once the lab has completed testing your water, you will receive a report that looks similar to Figure 1. It will contain a list of contaminants tested, the concentrations, and, in some cases, highlight any problem contaminants. An important feature of the report is the units used to measure the contaminant level in your water. Milligrams per liter (mg/l) of water are used for substances like metals and nitrates. A milligram per liter is also equal to one part per million (ppm)–that is one part contaminant to one million parts water. About 0.03 of a teaspoon of sugar dissolved in a bathtub of water is an approximation of one ppm. For extremely toxic substances like pesticides, the units used are even smaller. In these cases, parts per billion (ppb) are used. Another unit found on some test reports is that used to measure radon–picocuries per liter. Some values like pH, hardness, conductance, and turbidity are reported in units specific to the test.

In addition to the test results, a lab may make notes on any contaminants that exceeded the PA DEP drinking water standards. For example, in Figure 1 the lab noted that total coliform bacteria and iron both exceeded the standards.

Retain your copy of the report in a safe place as a record of the quality of your water supply. If polluting activities such as mining occur in your area, you may need a record of past water quality to prove that your supply has been damaged.

Trick To Use Metal Roof For Your Roof

Trick To Use Metal Roof For Your Roof

Metal Roofing – Advantages & Benefits

Metal roofing has now entered the mainstream and has become a viable option for nearly all homes, except those with very flat roof pitches. Nor do all metal roofs scream “metal.” There are now shingle-style metal roofing products that are almost indistinguishable from traditional asphalt shingle roofs.

Metal Roofs Are Not Just a Novelty

Once, metal roofing was found only on high-end, architect-designed homes. That’s no longer true. Metal roofing is increasingly found in conventional houses, thanks to increasing availability and improved manufacturing processes. According to industry statistics, market share for metal roofing has been increasing at a rate of roughly 3 percent each year over the past few years; currently, about 15 percent of all roofing installations use metal roofing materials. At the same time, the market share for asphalt shingle roofing has fallen, now accounting for about 59 percent of the total roofing installed.


Metal Roofing Benefits

Among the many materials used in modern residential roofing, metal roofing has become an increasingly popular alternative to traditional asphalt shingles. Typically constructed of steel, aluminum or copper strips, metal roofing offers great protection for your home and has countless advantages.

Some of the many advantages of metal roofing:

  • Lightweight & portable: About ¼ the weight of a tile roof, and roughly ½ the weight of asphalt shingles.
  • Durability: Metal roofing is highly resistant to hail and wind damage. It is also more resistant to fire, and can last up to three times the lifespan of an asphalt shingle roof.
  • Low-maintenance: Most metal roofing products require very little or no maintenance.
  • Energy efficiency: Metal roofs are considered among the most energy efficient types of roofs. They reflect a greater share of the sun’s rays and, depending on any coating applied to the metal, homes may see a savings of 20 to 30 percent on air conditioning costs.
  • Style: More than any other roofing material, metal roofs are available in a wide array of colors, styles, and textures. Metal roofing can greatly enhance the appeal of a home. Copper roofing, in particular, is a very attractive option. Over time, copper roof changes color, adding character and beauty to a home.


Disadvantages of metal roofs

Despite their many advantages, metal roofs have some potential drawbacks.

  • Affordability. Metal roofs can be as much as two or three times more expensive than other roofing materials. While the life of a metal roof is much longer, investing in a metal roof only makes sense if you plan to stay in your home long enough to enjoy the cost benefits.
  • Noisiness. Metal roofs can be noisy, especially during a heavy rain or hailstorm. Adding more insulation during installation usually solves this problem, but that may increase costs.
  • Expansion and contraction. Metal roofing materials that are attached as large panels tend to expand and contract. If they are not properly installed with fasteners that allow the metal to “breathe,” the panels may loosen.
  • Inconsistency of color match. If a repair is required or a home extension is added years later, it may be difficult to find an exact match to the existing metal.
  • Performance. If water accumulates anywhere on the roof because of poor-quality installation or repair, it can eventually cause serious damage. Low-grade metals may also be thinner and less durable. Some metals rust in certain climates or dent more easily than others during hailstorms or installation.


4 Common Metal Roofing Problems

If you have a metal roof, it’s important to keep an eye out for some common causes of damage typical for that roofing material. Handling small repairs as they’re needed is the best way to ensure that your metal roof will last for decades.

Roof Leaks

Roof leaks are one of the most common problems that homeowners experience with metal roofs. Poor craftsmanship often results to gaps and punctures in metal roofing, making leaks more likely to occur. Leaks tend to grow over time, so if you notice a leak, make sure to address it as soon as possible. You’ll likely end up saving yourself a lot of money and stress.

Blow-offs

Blow-offs may also occur as a result of poor installation. If flashing is poorly attached, for instance, open seams and laps can cause parts of the roof to blow off. To avoid this, make sure to have your roof installed properly by a professional contractor and check regularly for problems. Preventing blow-offs initially can save you from costly roofing repairs later.

Punctures & Tears

Punctures and tears may also be problematic. If there is a lot of foot traffic on your metal roof, these are much more likely to occur. This typically happens during a roof’s initial construction, but may also arise during routine metal roofing maintenance. Caulking is often used to repair tears and punctures. Unfortunately, because metal roofing is prone to a lot of movement, caulking may not prevent future problems. Keeping foot traffic on your roof to a minimum is the best way to minimize the occurrence of punctures and tears.

Ponding water

Ponding water is another leading cause of metal roofing problems. When water collects on the roof, it causes undue pressure and may lead to leaks and other problems. When it comes to ponding water, a little bit of maintenance can save you a lot of money and undue stress. By regularly clearing pools and puddles of water—especially after heavy rainfall—you can avoid problems that would otherwise be caused by ponding water.


3 Types of Metal Roofing to Consider for Your Building

Metal roofing is a great option for commercial buildings because it is durable, long-lasting, and highly recyclable. However, some property owners have difficulty picking the type best suited for their building. Here are a few types of metal roofing materials and their characteristics.

  1. Aluminum

metal roofingAluminum’s durability is due to a protective aluminum-oxide seal that is created when the metal is exposed to oxygen. This seal prevents rusting or oxidation from occurring. Aluminum is also very light and malleable, so it can be molded easily into numerous designs to fit the architectural style of almost any building.

  1. Copper

Copper roofing is appealing for its shimmering reddish-brown color and its longevity. Though it is a relatively soft metal and dent-prone, a roof made of the copper can last 50 years or more with proper care. Its long-lasting characteristic and easy maintenance also make it a cost-effective roofing option despite its expensive upfront cost. And while it’s not as quiet as asphalt or wood shingles, it emits less noise when compared to other metal roofing materials because the added substrate muffles the sound of rain or hail.

  1. Zinc

While it’s not as light as aluminum or quite as malleable as copper, zinc is more durable and costs less, making it an appealing roofing option. Zinc is longer lasting than almost any type of metal roof material. A well-maintained zinc roof can last for a century with minimal degradation. Its long life span coupled with its low purchase cost means you’ll spend significantly less money on a zinc roof over time.

Tips To Eradicate A Termite

Tips To Eradicate A Termite

DIY Termite Control: Must-Know Tips for DIY Termite Control

Termites are active all year-round, so there’s no bad time to start preparing your defenses against these wood-chewing pests. There are many highly effective DIY termite control steps that homeowners can take to guard their homes. Here is what you need to know.

Inspect Your Foundation Each Season

Several times a year, take a slow walk around your foundation and look for any signs of damage so you can formulate a termite treatment plan. No, termites don’t eat concrete, but they do create mud tubes, which are a sign termites are trying to scale up your foundation in search of siding or other tasty wood. If you see mud tubes, it’s time for a closer inspection and some DIY termite control tactics.

Maintain Proper Ventilation and Sealing

Ventilation and sealing are key to moisture control. Without the right ventilation in attics and basements, condensation can build up and seep into wood and make it the perfect habitat for termites (plus condensation causes mildew and rot). And without the right sealing and moisture barriers, moisture can even build up behind your walls. Without that moisture, termites have fewer reasons to go exploring, which makes this one of the more effective termite control methods.

Create an 18-Inch Space Between Soil and Wood

Any place that you have wood that you want to protect—especially siding and decks—you should try to separate it from soil (where termites linger) by at least 18 inches. This is enough to keep termites uninterested. The easiest method is to use a gravel bed, which can serve as DIY termite control and good drainage at the same time.

Use Repellent Termiticide on Safe Wood Structures

Repellent termiticides help you protect wood that has not yet been located by termites. Use it around sheds, decks, fences and similar areas to help prevent termites from discovering them.

Heat Can Also Kill Termites

Termites are heat-sensitive, so heat can be an excellent termite repellent and an easy homemade termite killer. If you can heat up a space to at least 120 degrees F. for at least half an hour, the termites there will die. This is a cost-effective way for DIY termite control without using pesticides. However, you can’t try this near plastics or wiring, and it doesn’t work as well on especially large beams, so be careful.


Do Termites Live in The Ground?

As we already mentioned, termite larvae live in underground burrows all its life. These insects can be found on all continents except Antarctica. However, most of the species are found in tropics, subtropics, and sometimes in warm temperate regions. There are more than 2000 different termite species, some of them live only in certain places, are protected by the government and are on the IUCN Red List. There are only 10 species of termites in Europe, while Africa has more than 1,000. The northernmost areas where termites can be found are in the south of Canada, in central France, Korea, and Central Asia.

Mediterranean termites, which do not cause any severe damage, live in temperate climates of the Mediterranean Sea region.


HOW TO GET RID OF TERMITES YOURSELF: THE 5 BEST METHODS

Professional termite control is expensive; there’s no doubt about that. After seeing just how expensive, it’s natural to wonder how you can kill termites yourself and whether or not it would be effective. The good news is that if you detect the infestation early enough, you stand a great chance of taking care of the termite problem yourself.

We’ve compiled five of the best DIY methods on how to kill termites yourself right here.

METHOD #1: LIQUID TERMITE BARRIER

This method will not only kill the termites already present in your house, but it’s a good preventative method too. The idea behind a liquid termite barrier is to completely surround your house in a pesticide barrier that will poison termites upon contact. While it is commonly used around the entire foundation of the home, it can also be used around specific wooden structures, wood piles, or tree stumps.

METHOD #2: POISONED BAIT

For some people, the liquid barrier treatment, though undeniably effective, is a little too radical for them. They might not view their termite problem as too serious, or perhaps they do not feel comfortable with having gallons of pesticide being sprayed around their home. For such individuals, we recommend using poisoned bait. You don’t have to spray pesticides around your home; the bait will attract foraging termites that will then spread the poison back to the colony.

METHOD #3: DIRECT CHEMICAL TREATMENT

While a liquid barrier treatment or poisoned bait is very effective for the outside of your home, you can’t really use it for the inside of your home. Don’t get us wrong; liquid barrier and poisoned bait treatments are perfectly able to kill the termites within your home due to the poison transference effect. We are just saying that you cannot directly use the products within your home. That means that if you spot some termites in a crevice in your wall, attic, and rafters etc. you need something to take care of them right there and then.

METHOD #4: BORIC ACID

Boric acid is considered to be the best ‘in between’ solution when it comes to the pesticides vs. natural solutions debate on pest control.

It works on most insects, including termites, where it is theorized that it affects their digestive and metabolic systems. After contact, it would take anywhere from 3 to 7 days for an exposed termite to die. And while not exactly a natural remedy, it is much lower in toxicity compared to the stronger insecticides used in the previous methods.

METHOD #5: BENEFICIAL NEMATODES

Now we are getting wholly into the ‘natural’ methods of termite removal. No pesky chemicals required, however be warned that chemicals and pesticides are used for a reason; they are extremely effective. That said, if your termite problem is on the minor side or if you are looking more for prevention rather than cure, these natural methods are a good option with zero health risks.

When these beneficial nematodes come into contact with termites or other harmful insects, they invade its body and begin feeding on it. In the process the nematodes release gut bacteria that cause blood poisoning and subsequent death of the host. After the host is dead and consumed, the nematodes move on to their next target, while breeding and multiplying the whole time.


Take Preventive Measures

The best way to treat a problem is to make sure the problem never occurs. Instead of trying to find ways to get rid of termites, look for ways to keep them from getting into your home in the first place. Regular Mesa termite inspections can help you keep tabs on the situation. But you should also make sure to keep wood, cardboard, and other cellulose away from your home – such as extra lumber in the crawl space, firewood stacked up in the garage, or even untreated mulch in the bed by your door. You should also keep moisture out of your home by ensuring that you have proper ventilation, as well as proper drainage in the landscape around your home.


HOW TO KEEP TERMITES OUT

  1. Keep all shrubbery near your home trimmed, allowing at least 12 inches between the shrubbery and the exterior wall of your home. This will create a nice air flow and allow damp areas to dry out quicker. It also allows termite tubes and termite damage to be discovered earlier.
  2. Use pine needles instead of mulch. Pine needles are less appetizing to subterranean termites and will also help minimize the environment that other insects such as ants like to nest in as well. If pine needles aren’t available in your area, consider pea gravel or other non-organic material as a barrier between your house and mulch.
  3. Keep all sprinkler heads pointed away from your home’s foundation. Subterranean termites like moisture and a sprinkler pointing toward you home creates an ideal environment for them.
  4. Preventative maintenance goes a long way. By properly maintaining the exterior of your home such as wooden siding or windows, it will decrease the likelihood of water leaking behind your wall and creating an ideal environment for subterranean termites.
  5. If your home has a crawl space underneath it, make sure it has proper ventilation and a good vapor barrier to help minimize moisture from reaching the floor joists and subfloor. Moisture not only can be a conducive condition under your home, it can also cause wood destroying fungus to grow. Moisture in a crawl space can also lead to unpleasant odors inside the house and in the right conditions create an environment for certain kinds of wood destroying beetles to infest the wooden members under your home.
Found The Way To Use Payroll Service

Found The Way To Use Payroll Service

Do You Need To Outsource Payroll Service?

Millions of U.S. businesses outsource their payroll processing. Why do they do it, and what benefits does it bring them?

How common is outsourcing payroll? In a recent survey conducted by Robert Half and the Financial Executives Research Foundation1, 39 percent of U.S. companies — more than 10 million businesses — claimed they outsource their payroll processing. And 43 percent outsource their payroll tax responsibilities.

While some businesses opt to handle running payroll functions in-house through manual bookkeeping or do-it-yourself payroll apps, small business owners have increasingly come to prefer the expertise of professional payroll providers.


But why do so many business owners decide to outsource payroll? Here are main reasons:

  1. Outsourced payroll saves time

If you handle your payroll in-house, you know that it requires a lot of time and attention to detail. That demand on your time increases as your staff grows. Each pay period becomes a series of checks and balances to ensure no errors are made while handling a considerable amount of data that varies from employee to employee.

The inability to relinquish control, and the failure to delegate tasks to better manage your time is a bad business habit you need to give up.

  1. Overhead costs are reduced

As a business owner, your time has a dollar value that’s linked to the revenue you generate from the tasks you handle at any given time. The time you are able to save each day is money earned.

If you look at the total time you spend on payroll each pay period compared to the costs of outsourcing, you’ll see a great deal of cost savings when you take those tasks off of your plate.

  1. Improved data security

There’s a fair amount of risk that comes with in-house payroll. The door is wide open for identity theft. Employee records can be viewed by those who handle payroll. Employees can tamper with records for personal gain, and there’s also the risk of embezzlement.

Aside from these employee risks, you’ll need to consider the security of your payroll software. While the software itself could be relatively secure, you may house your data on a server or network with security flaws that could leave you open to data theft.

  1. Guaranteed government compliance

Payroll firms understand tax law. It’s their business to keep up with the rules, regulations, and changes in tax law. They guarantee accuracy and compliance. If there are mistakes, they’ll make corrections while handling the liability of any errors they may make.

  1. Access to a variety of services

Aside from the standard payroll and tax calculation, some platforms offer additional value-added services like contract generation, contractor services, labor law compliance, access to health benefits, workers’ compensation payments, and bookkeeping services.

A worry-free payroll

A professional payroll provider employs people who know payroll processing–professionals who specialize in the complexities of regulations, government compliance, taxes, and human resources. It’s what they’re trained to do and the core of their service guarantee. You can save yourself a lot of time, money, and he


Why Payroll Is One Function You Should Outsource

But the question business owners and managers want answered is:  what do you actually gain from outsourcing payroll? Is it worth all the time and effort just to investigate and identify appropriate outsourced service providers?  Then there’s the work involved to transition the function outside to the third party service.  Do the benefits of outsourcing outweigh that effort? chose to outsource the functions to reduce the risk of the payroll not being processed, to manage growth by anticipating the increased payroll responsibilities that will be required as the firm grows and hires more employees, and to keep up with technology, such as pay cards and direct deposit.”

Ideally, outsourcing achieves three main goals:

  • It frees up time and resources to focus more on your core business.
  • It gives you access to more technology and expertise to perform payroll well.
  • It reduces costs and risks.


Payroll Software vs. Payroll Service

There are two basic ways a business can carry out payroll:

Option 1: You can do it yourself using payroll software. Online payroll software applications work in a similar way to tax software. They give you a handful of prompts and information, but you—or someone in your business—must do all the input. The software company can offer online support, by phone, chat, or FAQs.

Option 2: You can outsource your process by giving a payroll service the basic information on employees and letting them run payroll, send out paychecks, do all of the reporting, and sending all the payroll tax payments out


Outsource payroll the right way

With payroll outsourcing, it often comes down to what’s most efficient and cost-effective for your business. It pays to do your homework and assess your business needs before making a decision. If you get the right provider, you’ll spend less time thinking about payroll and more time doing what you do best – running and growing your business.

Theme: Overlay by Kaira