Find The Way To Make Tile Flooring

Find The Way To Make Tile Flooring

How Long Does It Take To Install Tile Floors?

How long it takes to install a tile floor depends on several things, including the skill level of the worker, the material and the size of the room. According to experts, it takes a beginner about 16 hours to lay ceramic or stone tiles in an average room. A person with intermediate skills takes about 12 hours and experts, such as our Lewisville professionals at Pro Flooring, take about 10. This doesn’t even add in the hours it takes to prepare a subfloor, which takes a pro about 4 hours.

The right way to buy tiles is to measure the area of the floor, and add about 10 percent to the number to allow for the inevitable broken tiles. Also, we tell our customers to make sure that all of the tiles have the same dye lot number, if that’s appropriate.


Subfloor vs. Underlayment

It is important to distinguish the components of a flooring system in order to understand the best installation practices for ceramic tile. Except for slab floors, any flooring system consists of three primary components: the joists or structural support component; the subfloor, which is usually a layer of OSB (oriented strand board) or plywood; and the underlayment, a final layer that lies just beneath the surface flooring and which is selected to match the needs of the flooring material. Not every floor has all three components. In a home with a concrete slab foundation, or in basements, ceramic tile is often installed directly over the concrete slab.

In any flooring installation, but for ceramic tile in particular, the success of the flooring depends largely on the quality of the underlying support system. There are six subfloor/underlayment structures that are widely accepted for ceramic tile floors.


Tiling Challenges

  • Dry thinset mortar is cheap, but it is also difficult to mix. The solution is to buy pre-mixed mortar. While significantly more expensive, pre-mixed thinset saves you from the aggravation of getting water-to-thinset measurements correct. Plus, mixing up dry thinset is physically difficult.
  • Your tile work is only as good as your substrate or subfloor. If you do not have a good subfloor, your tile will not lie flat. Lippage will occur—adjoining tile edges that are not the same height. Even worse, a base floor that is not solid enough will eventually cause the tile to crack.
  • Perimeter tiles will need to be cut. You can use either a wet tile saw or what is often colloquially called a snap tile cutter for this. More likely, you will want to use both types of tile-cutting tools. If you happen to have any bad cuts, you can position them so that the ragged cut falls under a baseboard or under a cabinet toe kick overhang.
  • Even tiles within the perimeter can be difficult. They do not automatically fall into straight lines: you need to impose this.
  • Laying tiles on a diagonal. Diagonal tile cutting can be a frustrating experience for the novice tiler.
  • Spacing tiles correctly is hard. Be sure to use plastic tile spacers to impose the correct distance. While spacers are a pain to remove, they ensure perfect spacing of tile seams.
  • Constantly being on your knees on a hard surface can affect the quality of your work. For this reason alone it is worth purchasing an inexpensive pair of tiler’s knee pads.


How to prepare a plywood subfloor

Measure the space and cut cement backer board to fit. Adhere the backer board to the plywood with thinset adhesive, leaving a 1/8” gap between the sheets, and a 1/4” gap around the edges of the room. Make sure the seams of the backer board don’t align with the seams of the wood subfloor.

Next, fasten the backer board to the floor with screws spaced six to eight inches apart. Set the screw heads beneath the surface of the board to ensure that it’s completely level.

Use glass fiber tape specifically made for backer board to reinforce the joints. If the tape is non-adhesive, fill the gaps between the boards with mortar before applying the tape. Finally, cover the tape with a thin layer of mortar and allow it to dry completely before proceeding.


Why are tiles soaked in water before use?

Soaking the tiles isn’t always what you want to do. If you are using an epoxy or some other kind of mastic adhesive, soaking the tile will just weaken the adherence. However, if you are using Portland cement based mud-set or thin-set mortar, and your tile is stone or unglazed ceramic, then by soaking the tile, you ensure that it doesn’t weaken the join between itself and the cement by pulling water from the cement.

Good Interior Painting Will Make You Comfort At Home

Good Interior Painting Will Make You Comfort At Home

Things to Consider When Interior Painting

If you are thinking about interior painting techniques, you are in the right place at the right time. We will give you tips and tricks on an interior painting that you will love, color tips on the interior painting will make you feel awesome right away too.

If you are a beginner, you might want to know how to paint a room. Well, we will talk about seven tips that will take your interior painting to a new level, and that is also awesome for you down the line these days too. Here are seven things you need to know about interior painting:

Avoid Lap Marks

To avoid any lap mark, you need to roll the wall`s full height. Then, you have to keep an essential wet edge. That will give you the results you seek, but you have to do more.

Consistency

Do you want consistency in your room? If so, you have to mix some cans of paint. Do this in a large bucket. It will make your room look pretty, and you will love what you will see too.

Paint The Trim First

You have to paint the trim before you paint the walls and ceiling. This is the order that you have to follow when you decorate a room, and that will give you the results you seek too down the road.

No Texture Or Flashing Differences

You have to use a coat of primer to get rid of texture and flashing differences. Yes, that is all it takes. The light will not be a problem for the walls anymore too.

Strong Bond

You have to clean any dirty surface so that the paint may form the strong bond that you have been waiting. This strong bond will allow you to have peace of mind over time because you have done the job correctly over time.

Clearing The Room

You have to clear the room of any small item out there so you can do the job properly at all times. Stack any little thing on a big thing so you can genuinely do the job over time.

Masking Tape

You have to apply what is called masking tape only to any select tight corner out there. Therefore, not all areas are eligible for this stuff. Use what is called medium sandpaper to sand lightly any wall that feels gritty.


Things You Should Know Before Painting A Room

Paint colors can dramatically change the mood and interior design of your home. Paint can make a statement with splashes of  bold color, or it can be a soft backdrop to a more muted interior. Either way, painting is one of the easiest and least expensive tools in the interior design world. However, there are a few things you should know before you paint—things that will make your job much easier :

  • Prepping a Room Does Make a Difference
  • Test the Paint Color
  • Painting a Room – Allow Color Into Your Life
  • Pay Attention to the Finish You Choose
  • Paint Can Be Changed
  • Brush Before Rolling
  • Prep Your Roller and Paint Brushes


Here is a list of common errors that painters make during a paint job.

  • Blistering occurs if air bubbles are trapped under the paint coating.
  • Brush marks occur if the viscosity of the color is not consistent along with the strokes.
  • Without proper drying of the paint, chalking or cracking may cause on the walls.
  • Cissing is caused when impurities remain on the surface.
  • If the proper putty is not applied then dampening can cause microbial growth on the walls.
  • Patchiness and runs are common if the application of the paint is not done uniformly over the walls and the paint is mixed very viciously.


THERE ARE A FEW IMPORTANT THINGS THAT YOU SHOULD KEEP IN MIND BEFORE YOU PAINT.

Keeping these things in mind will help make your job easier.

Experiment with Colors:

According to scientists, the colors in our rooms affect our mood and activities. Light and bright colors help us to feel calm and stay at ease. At the same time, vibrant colors in your room can have a variation of your feelings; like excited and happy. It is always good to experiment with colors when taking on a painting project.  Test a sample of your color selections on small areas first before making major decisions.

Maintain a Balance When Painting The Room:

It is really difficult to determine how a particular color will look on your walls and with your lighting. So, if you have a particular color in mind, go and grab a sample. Once you are done experimenting with different colors and the impact to the walls, you can continue applying the color of your choosing.

Pay Attention to The Other Details Of Your Room:

Surprisingly, not only does the color matter, but the other details of your home like the amount of lighting it receives, the amount of traffic, and the furniture all play a roll. The color you choose should compliment the other details of your home.


Step to Paint a Room :

  1. Plan Your Approach
  2. Repair Damaged Surfaces
  3. Prep the Room
  4. Prep the Materials
  5. Using a Brush
  6. Using a Paint Roller
  7. Paint the Trim
  8. Clean Up

Paint rollers are inexpensive and disposable, but brushes are costly and worth saving, and they can be used many times if given proper care and cleaning. To make brush cleaning easier, drill a 1/4-inch hole just above the metal ferrule, then insert a wire or large nail into the hole. Suspend the brush over a jar or other container filled with enough water or paint solvent to cover the bristles. Let it soak for a while, then rinse and dry the bristles with a clean rag. Wrap the brush in plastic wrap or place the brush in its original package to keep the bristles straight.

Tips How To Handle Ants

Tips How To Handle Ants

HOW TO FIND AN ANT NEST

CAN YOU FOLLOW ANTS BACK TO THEIR NEST?

Trailing ants back to their nest is possible, but it can be very difficult. Ants are often hard to track due to their size and ability to sneak into spaces were humans cannot. Still, if you have patience and determination, you can try following the ants you see. With luck, they will take you back to their nest site.

However, you should be aware that ants rarely walk in a straight line from a food source to their colony site. Instead, many ants walk a zigzag pattern — the result of previous ant-explorers searching for something to help feed the colony. Those scouts laid down a pheromone trail for other ants to follow. Since these trails often meander, it can take an ant a long time to cross even a short distance.

HOW TO FIND AN ANT NEST INDOORS

Tracking ants to a nest inside your house is very important. You want to address these house ants as soon as possible to eliminate the colony that could be damaging your structure and polluting your food and water.

THREE GREAT WAYS FOR BATTLING ANTS INSIDE THE HOUSE

ant nest dustIf you have ants inside your house, TERRO® offers several great options for controlling these bugs.


Ant Inspection Guide

Where to Inspect Indoors

Most ant species prefer moist areas to nest and hide eggs. Typically kitchens and bathrooms are the first rooms to be infested. Use your flashlight to look for ants behind or under refrigerators, stoves, microwaves, dishwashers, sinks, and cabinets. Ants may also be found in or around floor drains, inside the motor areas of refrigerators and microwaves, behind wall paper and in cracks and crevices in cabinets and around walls.

Where to Inspect Outdoors

Ants are opportunistic by nature and can make a nest just about anywhere depending on the species of ant. When inspecting for ants outdoors you should look.

  • In firewood piles
  • Under yard debris
  • In electrical and utility boxes
  • In dirt mounds in the yard
  • Under the siding on your structure


Tips for Eliminating and Preventing Ant Infestations in the House

Seal Entry Points

Ants are tiny creatures and can enter homes and buildings through minute cracks and crevices. To minimize this, seal around windows and doors and all cable, pipe, and wire entry points. Regularly inspect foundations for tiny cracks through which ants can gain entry to your home.

Keep It Clean

Sanitation is critical for the prevention and control of any pest. Like all living creatures, ants need water, food, and shelter for survival. Ants leave the shelter of their colony to find food and water. Don’t make it easy for them! Keep foods sealed, floors swept, and all surfaces cleaned. Be especially careful to keep things clean while you are targeting the nest, as this will make the sweet ant bait the only thing available to the ants. But don’t clean away the ant trails until you have eliminated the infestation, as these trails will allow the ants to find your bait and carry it back to the nest. Once the infestation has been eradicated, then clean up the trail surfaces and keep them clean.

Use Spray Pesticides Outdoors—Carefully

If you happen to follow ant trails and identify an outdoor nest for the colony, then it may make sense to apply a heavy dose of liquid pesticide that can soak down to reach the queen. Drenching the nest with an approved insecticide spray (following all label directions) can be effective. Make sure, however, to verify that this is the colony creating your indoor infestation problem. Many types of ants are helpful garden creatures that you have no reason to kill. And be aware that these pesticides are likely to be toxic to all insects, including beneficial ones, so apply them carefully according to label directions.

Be Patient

The worker ants will carry the pesticide bait back to the nest, but it can take several days to eliminate the colony, or even a few weeks if the colony is very large or it has several queens, as some ant species do. You may even need to replace the bait station if the ants empty it. Gradually, though, you will see an end to the infestation.

Use Ant Bait Indoors

Avoid the temptation to simply use pesticides to spray visible ants marching along trails in your home. Pesticide sprays can eliminate a few visible ants, but more will quickly replace them, and you’ll never make real progress to eliminating the infestation. Instead, use these worker ants as the ticket into the colony by placing ant bait for them to carry back to the hidden nest.


How to Get Rid of Ants

Keep ants out of your yard.

Yes, this is very tough to do, but there are pesticides (again, available at your local hardware store) that you can apply to your lawn on a regular basis that will help keep ants at bay. It also helps to keep your grass cut short during growth months so that you can see the appearance of any new hills as fast as possible.

Get rid of easy access to your home.

Now that you’ve gotten rid of all the culprits, you need to focus on keeping them away for good. While you have already put out repellant on the ground you need to make sure that you also discourage any other methods for the ant to get across the yard and onto the house, thus avoiding the stuff they hate on the ground. The way to do this is make sure there are no plants, trees or, undergrowth touching the house. Trim any such contact back and try to keep a 6-inch clearance space between soil and your foundation. Also, remove any standing log piles or any other inviting piles of organic matter from within close reach of the house. You’ll also want to seal any cracks and crevices with caulk.

Fire ants.

These insects, known as red imported fire ants (RIFAs) are aggressive and will dose out a painful round of bites (multiples) to anyone that disturbs their nest. They are also an unfortunate way of life in Georgia. The best way to remove them is to apply a heavy concentration of fire ant bait purchased from a local hardware store. The best time to apply bait is in early spring when ants begin to form new colonies and again in the fall. Give your entire lawn a treatment. If any mounds survive then give them a heavier dose – but not directly on the mound, sprinkle it uniformly in a 3-4 foot circle around the mound.

Destroy outside ant colonies.

If it’s not carpenter ants, the colony spawning the invaders is likely outside. Check your lawn, but also be wary of loose bricks or siding on your house. If you find ants watch their movements and follow them to the nest. Once you discover it use insecticide to destroy the colony. You may also pour boiling water (3 quarts or more) over any hills and then, once it has dried, pour another mixture of orange rinds and water onto the hill. A mixture of liquid dish soap and water will also kill ants.

Find indoor ant nests.

If you have carpenter ants, you cannot just feed them bait and have them carry it back to the nest and the queen. They don’t behave that way. So, you will have to locate the nest and deal with the critters there. Carpenter ants tunnel through wood and can do serious damage to your home. They generally like damp areas, so be wary of any spots in your home afflicted by leaks, including framing and flooring. If you cannot find the area easily call an expert that can devote all of his time to locating the culprits. If you do find the colony, douse it with an insecticide that contains bifenthrin, permethrin or deltamethrin. Be careful with these chemicals, or if you’d prefer, call a professional.


How To Get Rid of Ants

If You Can’t Stop The Them, Are Ants In The House Harmful?

Ants tend to be harmless in your home. They don’t carry disease like other pests, but they are very persistent creatures. Most ants that you find in your home are mostly just a nuisance and aesthetically displeasing, if anything.

“People spend a lot of money on year-round pesticides,” says Deborah M. Gordon, associate professor of biological sciences and lead author of the study published about ant infestation by Stanford researchers, “but it’s not the pesticide that keeps ants out of your home, it’s the weather.”

If you find ants in your home, don’t worry! Most people will find ants in their home at some time or another. Controlling your ant problem in your home is your best bet, and using a combination of the above techniques during the peak ant infestation months will help to keep your ant problem under control.

How do I get rid of ants permanently? Is it possible?

​I would say that it is relatively impossible to permanently stop ants from coming into your home.

It’s important to know that once ants get into your home, they won’t go away on their own. You’ll have to hire a professional to take care of the ant problem or you’ll have to learn to get rid of ants yourself.

The Best Way To Find A Dermatologist

The Best Way To Find A Dermatologist

Dermatologists: What do they do?

A dermatologist is a doctor that specializes in treating skin, hair, nail, and mucous membrane disorders and diseases.

They can also address cosmetic issues, helping to revitalize the appearance of the skin, hair, and nails.

The Centers for Disease Control and Prevention (CDC) estimate that, in the United States, there were 39 million visits to office-based dermatologists, who were not federally employed, in 2010.


Types of Dermatology 

A dermatologist is a medical doctor (M.D.) who specializes in treating the skin, hair, nails and mucous membranes, such as those in the linings inside the mouth, nose, and eyelids. All dermatologists receive training in the four branches of dermatology: medical dermatology, cosmetic dermatology, surgical dermatology, and dermatopathology. However, a dermatologist might choose to specialize in one of these specific branches:1

  • Medical dermatology: The dermatologist diagnoses, treats and helps to prevent the diseases that can affect the skin, hair, and nails.
  • Surgical dermatology: The dermatologist treats the diseases that affect the skin, hair, and nails through surgical procedures, such as the removal of skin cancer.
  • Cosmetic dermatology: The dermatologist uses treatments to improve the appearance of the skin, hair, and nails. Cosmetic dermatology is just that: cosmetic. It’s not an essential component of maintaining good health. It encompasses procedures such as injecting fillers for a more youthful appearance, chemical peels, hair transplants and laser surgery to diminish the appearance of scars, wrinkles, varicose veins, etc.
  • Dermatopathology: The dermatologist specializes in dermatology and pathology. He or she examines samples of the skin, hair, and nails to diagnose and treat diseases.

6 Reasons to Schedule a Dermatologist Visit

A dermatologist plays an important role in educating, screening, and treating various skin issues, including:

1. Acne. If you have acne that is not responding to an over-the-counter skin treatment, you may want to schedule a visit with a dermatologist, advises Woolery-Lloyd. A dermatologist can determine which kind of prescription treatment would be most effective for your acne and lifestyle, according to the AAD.

2. Skin cancer. A dermatologist can screen you for skin cancer. Talk to your family doctor or dermatologist about how often you need to be checked for changes to your skin. An annual body check is especially important if you are in a high-risk group — if you are fair-haired or light-eyed, or you have a history of blistering sunburns, according to the National Institutes of Health.

“As dermatologists, we know that the early detection of skin cancer by routine skin examinations is crucial for successful treatment,” says Robert S. Kirsner, MD, PhD, chair of the department of dermatology and cutaneous surgery at the University of Miami’s Miller School of Medicine.

In addition to regular screenings, you should also see a dermatologist if you notice a change in the shape, size, or coloring of any of your moles. A dermatologist can remove some or all of the suspicious tissue and examine it under a microscope to check for cancerous cells. Dermatologists also see people who are being treated for other cancers and experiencing skin side effects due to their medication.

3. Eczema. This chronic skin condition is characterized by irritation, itchiness, and flaky patches of skin, according to the AAD. A dermatologist can help find ways to manage your eczema and prescribe any necessary treatment.

4. Skin damage. If you are concerned about minimizing skin damage or caring for aging skin, a dermatologist can suggest products or lifestyle changes that reduce your exposure to damaging elements.

5. Specialized care of skin, hair, and nails. You can talk to a dermatologist regarding any concerns you have about almost any condition that affects your appearance, according to the AAD. For example, skin conditions ranging from discolorations, to warts, to stretch marks, to psoriasis can all be treated by a dermatologist.

6. Scar treatment. Dermatologists can offer skin treatments to improve the look of almost any scar, including acne scars and keloid (raised) scars, according to the AAD. A dermatologist may refer you to a plastic surgeon for enhanced treatment of more serious scars, such as those due to burns.

Treating Acne Scars

Most of the time, those reddish or brownish acne marks that are left behind after pimples clear up will fade with no need for treatment. Picking or squeezing acne can increase the risk for scarring, though.

Acne scars take two forms:

  1. scars with a gradual dip or depression (sometimes called “rolling” scars)
  2. scars that are deep and narrow

A person’s acne needs to be under control before scars can be treated.

Mild vs. Severe Scarring

Treatments depend on how severe the scars are. In some cases, a doctor or dermatologist may suggest a chemical peel or microdermabrasion to help improve the appearance of scarred areas. These milder treatments can be done right in the office.

For serious scarring from previous bouts with acne, several types of treatment can help:

  • Laser resurfacing. This procedure can be done in the doctor’s or dermatologist’s office. The laser removes the damaged top layer of skin and tightens the middle layer, leaving skin smoother. It can take anywhere from a few minutes to an hour. The doctor will try to lessen any pain by first numbing the skin with local anesthesia. It usually takes between 3 and 10 days for the skin to heal completely.
  • Dermabrasion. This treatment uses a rotating wire brush or spinning diamond instrument to wear down the surface of the skin. As the skin heals, a new, smoother layer replaces the abraded skin. It may take a bit longer for skin to heal using dermabrasion — usually between 10 days and 3 weeks.
  • Fractional laser therapy. This type of treatment works at a deeper level than laser resurfacing or dermabrasion, Because fractional laser therapy doesn’t wound the top layer of tissue, healing time is shorter. Someone who has had this type of treatment may just look a bit sunburned for a couple of days.

For “rolling” scars, doctors sometimes inject material under the scar to raise it to the level of normal skin. Finally, in some cases, a doctor may recommend surgery to remove deeply indented scars.

One thing you shouldn’t do to deal with acne scars is load up your face with masks or fancy lotions — these won’t help and may irritate your skin further, making the scars red and even more noticeable.

If you have a red or brownish mark on your face that you got from a bad zit, it should eventually fade. However, it may take 12 months or longer. If you’re upset about acne marks, talk to your doctor, who might have advice on what you can do.

How do dermatologists treat hair loss?

Just as there are many causes, there are many treatments for hair loss. Dermatologists recommend treating hair loss early. Early means before you lose a lot of hair. Hair loss is harder to treat when a person has a lot of hair loss.

One or more of the following treatments may be part of your treatment plan.

Treatment available without a prescription

  • Minoxidil: This medicine is applied to the scalp. It can stop hairs from getting thinner and stimulate hair growth on the top of the scalp. The U.S. Food and Drug Administration (FDA) has approved minoxidil to treat hair loss. It is the only hair re-growth product approved for men and women. A dermatologist may combine minoxidil with another treatment.
  • Laser devices: Brushes, combs, and other hand-held devices that emit laser light might stimulate hair growth. These devices might make hair look more youthful in some people. Because the FDA classifies these products as medical devices, the products do not undergo the rigorous testing that medicines undergo. The long-term effectiveness and safety for these devices are not known.

Prescription medicine

The type of procedure that a dermatologist recommends will depend on how much hair you have lost. To achieve the best results, a dermatologist may use one or more of the following procedures:

  • Hair transplantation: Skin on the scalp that has good hair growth is removed and transplanted to areas of the scalp that need hair.
  • Scalp reduction:B Bald scalp is surgically removed and hair-bearing scalp is brought closer together to reduce balding. Scalp reduction surgery can be performed alone or in conjunction with a hair transplant.
  • Scalp expansion: Devices are inserted under the scalp for about 3 to 4 weeks to stretch the skin. This procedure may be performed before a scalp reduction to make the scalp more lax. It also can be performed solely to stretch hair-bearing areas, which reduces balding.
  • Scalp flaps: A hair-bearing segment of scalp is surgically moved and placed where hair is needed.

Outcome

Once your dermatologist knows what is causing the hair loss, your dermatologist can tell you what to expect. Sometimes hair loss does not need treatment. The hair will start to re-grow on its own. In some cases, changing what you do will stop the hair loss, allowing your hair to start re-growing. Sometimes treatment can restore hair.

Choose The Best Party Planner For Your Sweet Seventeen Party

Choose The Best Party Planner For Your Sweet Seventeen Party

Tips to Help You Choose the Right Party Planner

You have decided to bring together family and friends for a great party this summer with the help of an event planner, but how can you know that you are choosing the right one? Party planners are a dime a dozen and unfortunately not all of them are as good as they claim to be. You cannot afford to take any chances – not only do you want to impress your guests, you also don’t want to waste money by hiring the wrong party planner. Before you make any decisions take the following into account:

  • Do they have experience with the kind of party that you have in mind? There are many different kinds of parties that you can throw. You may choose to have a birthday party, a garden party, a neighborhood party, a dress-up party – it can be anything really. Just because an event planner is good at throwing one kind of party doesn’t necessarily mean that they do another kind. Before you sign any contracts find out whether the event planner has any experience with your kind of party.
  • Get clarification on the services offered. There are some excellent party planners who will take care of everything from sending out invitations to making sure that guests are fed and the venue is cleaned, but there are others who only offer advice. You are better off with a comprehensive party planner even if you have to pay more.
  • Find out what they can and cannot provide. The best event planners have everything that they need to throw a party. If they don’t have it they know where they can hire from. Make sure that your party planner can provide everything that is needed including plates and glassware, cutlery, service people, a DJ and everything else that will be needed to make your party a success.
  • Find out whether they are able to work with the kind of menu that you have in mind. This is especially important if you plan to offer your guests a special menu. You can ask them to cook samples that you can taste beforehand.
  • There will always be an unexpected guest at every good party – someone is bound to bring a plus one who you hadn’t included in your count. A good party planner plans for a few extras to ensure that everyone is catered for.


How to choose the best party planner here in Long Island New York or anywhere.

If you are wondering how to choose the best party planner here in Long Island or anywhere we have outlined some great tips here on this short page. When it comes to planning a party or special event there are a few things you should know that will help to make sure you have the best experience. The main goal is to make sure that you and your guests have as much fun as possible. Please take a quick read through the information below and you will find some very helpful tips on how to choose the best party planner for your next special event.

Do they have a good reputation as the best party planner in Long Island?

First and most importantly you always want to choose a party planner (or any kind of service provider) that has a good reputation. You can always check for reviews from real customers on (FB link – Google link – Yelp link) or other places. If you are looking for a company with a very good reputation we are here to help! Take a look at real reviews from happy Long Island Party People customers.

Are they an experienced party planning company?

Another very important thing you should do is make sure the party planner you choose has a lot of experience. How long have they been in business? What kind of parties do they have experience doing? Our team brings plenty of experience to every event we do. After 20 years of planning and executing all kinds of parties you can be sure that everything will go smooth and everyone will have as much fun as possible. Our team will do everything to make sure you and everyone at your party have a great time.

What party planning services do they offer?

Different companies offer different services and you always want to make sure the company you choose offers everything you are looking for. Are you just looking for DJ service? Are you looking for catering or a clown for your kids birthday party? Whatever service you are looking for we can help. LI Party People is happy to offer you premium service for all types of events.

What events do they provide service for?

Keep in mind that a wedding party is totally than a sweet 16. Some companies have a lot more experience providing service for specific events. Lucky for you our team here at Long Island Party People has plenty of experience working all kinds of events so you can be sure you are getting the best of the best.

Can they help you find the perfect location if you need it?

If you are looking for the perfect location some party planners can help you figure out and find the perfect venue for your event. Additionally, they might even be able to help get you the best price if they already have a relationship with that venue.

What are their fees?

This is a very important thing to consider. On one hand you always want to get the best price. But you also will get what you pay for. A good party company should be willing to offer a fair price and still deliver premium service. They should value your business and recognize that you and your guests will have plenty of future events. Here at Long Island Party People we look forward to making sure you and your guests have as much fin as possible. We also look forward to building a great relationship with everyone.

Who will be working your party? This is something most people dot think about until it is too late. Chances are that if the company has been in business for a long time and has a good reputation then you wont have to worry about this but just in case, you should always ask.


PARTY PLANNERS TOP 6 TIPS ON HOW TO THROW AN AWESOME PARTY!

Start planning early

You want this party to be one that lives long in the minds of your guests, so make sure you do it right – and that means no rushing! Part of our remit as party planners is to put together a realistic and achievable timeline.

Choose your theme

Now, this doesn’t have to mean a full on, dress up, Game of Thrones fest. (Although this is not uncommon)! Maybe just a colour, or one reference point relevant to the occasion. It helps to shape the visuals and the vibe.

Choose your venue carefully

Home or away is the real decision. If you have a house big enough to accommodate your guests then great – a garden marquee is also a fantastic option, and we are experts at transforming these bare spaces into oases of light, colour, fun, entertainment or whatever floats your boat! However, understandably it’s often not practical to entertain at home. So, make sure you find a venue that is fit for purpose. At Carmela Weddings and Events our experience means we have connections with a huge selection of venue options to suit every occasion!

Focus on what’s important

Every party is different and as experienced party planners we will always help you to prioritise the details of your event. Massive foodie? Get in some amazing suppliers – maybe street food vans, a hog roast or delicious bowl food. Music aficionado? We’ll help you choose the perfect entertainers, the ultimate party band or the DJ who really fits with your style. Cocktail lover? Why not create a bespoke cocktail bar, with original one off cocktails designed to perfectly tie in with your event. It’s our job as party planners to get to know you and ensure your event is authentic and fun!

Get the timings right

This is often overlooked, and is massively important. As much as we would all like to disagree, it’s not easy to party like an 18 year old when we’re, well, not 18 anymore! Choose start and finish times that will work for the demographic of your guests.


Tips on How To Become A Party Planner

You need to work in events to work in events, huh?!

Get as much experience as you can, in any and all event forms, from floristry, catering, awards, celebrations and everything in-between. If this means you need to volunteer your time at no fee, do so as this is the best investment you will ever make. If fortune favours you, work for a credible and experienced event planner or agencies. In the beginning I took a position at a venue conglomerate, half way through my career I took work at a caterer and then a global agency and recently at a well known hospitality chain. In short, how much you know and can action with confidence will get you more clients #FACT. This is a strict case of More is More. The more you know in every facet of events, the more you can do, manage and charge for your services.

Time to #LevelUp

This is the step where you stop being the horse and start being the rider. You ask for a promotion, a step up, take lead on an event. You need to go from Jack (or Jill) of all trades to a master of one. Choose a niche and focus on getting as much experience in that niche as possible. Later you can go back to a boutique of offerings to your clients but for now it’s all about mastery. Master an arena, a service, a type of event, then master what clients you want to work with, what vendors do they use, what venues, what magazines do they read and what party planners do they already work with? Time to become Dexter (the tv show of a serial killer, not the lab guy) and learn everything about your new niche. What are the best products? What are the best services to offer? Who is your target market, or avatar? Will you offer transparent pricing, free venue finding or full service event management?

Sharing is Caring/Show it or Lose it

Every photographer has a portfolio, every model a zed card. They say a picture can say a thousand words. So why not create places to showcase your work, start a newsletter, accounts on Instagram, Pinterest and LinkedIn. Share your success and allow others to do the same.

Fail to Plan or Plan to Fail

You do not need a business plan. It’s not the MUST HAVE everyone says it is. What you do need is a route to the client, and how much that is gonna cost you also known as Cost of Client Acquisition. How will you get your first client? How will you charge, get payment, pay others etc? Like all business you need to make sure what comes in is greater than what goes out. What are your expenses, operating costs, etc. (money going out)? Then look at different ways to get paid (money coming in) and different ways to charge for your event, such as: flat fee, percentage of expenses, charge for time spent AKA hourly rate, percentage of budget plus expenses occurred, companionable rate?


Event Planning Tips Every Budding Coordinator Needs to Know

Creativity is key

Communicator…check. Organizer…check. Artist…?

We put the time and effort into event design because experience matters. Stay creative by looking for inspiration outside of the events world.

Lean on your creative partners — like entertainers, furniture suppliers, and designers — who are responsible for the visual appeal of your event. Challenge them and be deliberate about every design detail.

Think like an anthropologist

If you manage events in cities across the country (or across the globe), you need to understand the culture and people in that location. Planning an event in LA? You better have a good grasp on the traffic situation. Consider the nature and demographic makeup of the city your event is in to avoid any serious oversights.

When choosing a destination, be conscious about the message it sends. Work with the CVB in the area to tie the culture of the community into the themes of your destination event.

Pics or it didn’t happen

How do you know you’ve designed a memorable event? One way is to find out if attendees are sharing photos or using your event hashtag on social media.

Design your event in a way that encourages interaction on social media. For example, create a pop-up photo booth, or paste the Instagram logo throughout the venue as a call-to-action.

We Can Fix Broken Pipes With This Tips

We Can Fix Broken Pipes With This Tips

How to Fix a Broken Pipe

Turn off the relevant supply valve if it’s a water supply leak. If you have a water supply leak, which is a leak in the piping from the water supply outside your home to a particular region of your house, turn off the closest valve. For example, if the leak is in the supply piping extending to your washroom, turn the washroom water supply valve clockwise to turn it off.

Turn off the sprinkler valve if the leak is in the sprinkler pipe. If your home has a fire sprinkler system, be sure to turn the sprinkler valve off. The sprinkler valve is located right before the primary water supply valve, which is the second valve downstream from the sprinkler system.

Drain the affected water line if it’s a water supply leak. Turn on any taps connected to the problematic water supply piping and drain them. For example, if your affected piping is in the washroom water supply piping, turn on the washroom faucet and let it run until no water comes out.

Locate water leaks in your wall. If your leak is located in water supply piping in your wall, you have to open it up. Score a line 10 inches (25 cm) long into the wall where you see signs of a leak. Now, cut along the scored line with a drywall saw and create a hole big enough to peek inside. Once you spot the source of the leak, make the hole bigger until you can access it.

Remove the damaged piping 1 inch (2.5 cm) from each side of the leak. Start by marking the locations to be cut on each side of the leak using a measuring tape and permanent marker. Now, wrap pipe cutter blade jaws around the first mark and grip the handles firmly. Tighten the screw on the cutters while at the same time rotating them clockwise. Continue doing this until the pipe breaks off.

Cut a repair sleeve 1 inch (2.5 cm) longer than the damaged pipe. A repair sleeve is the new piping—cut from the longer repair coupling—that connects the two exposed pieces of piping. To determine the length of the sleeve, measure the length of the damaged piece of piping and add 1 inch (2.5 cm). Now, mark this amount on a repair coupling from one of its ends using a permanent marker. Using your pipe cutter, grip the marked section firmly and turn the screw while rotating the cutter clockwise.


How to Fix Water Pipe Leaks & Problems

How to repair water supply pipes, including burst or leaking pipes, noisy or frozen pipes, including information on how to locate underground pipe leaks

Water leaks and broken pipes can be a big problem for any homeowner. Because water in supply pipes is under pressure (normally about 50 pounds per square inch), if a pipe or fitting springs a leak, the water usually sprays out with considerable force.

Because of this pressure, it’s usually pretty obvious if a pipe is leaking—even if the pipe is inside a wall or above a ceiling. You can often hear water spraying inside the wall or ceiling. The drywall becomes wet, particularly at the joints between panels. And water often pools at the base.

If water is staining the ceiling or dripping, the leak may be directly above, although water can travel along a joist or other interior framing member and stain a wall or ceiling some distance from the leak itself. If there are no stains or drips overhead as evidence, grab a flashlight and check the pipes in the basement or crawlspace.

Most modern home water supply pipes are copper, soldered together with elbows, tees, and other fittings. Threaded galvanized iron pipes are also common, particularly in older homes, but are being phased out because they tend to get clogged by mineral deposits over time.

It always helps to have at least one pipe repair clamp on hand just in case a pipe bursts—especially if you live in a climate where pipes are likely to freeze. You can buy these quick-repair screw-on devices at any home improvement store or online.


Temporary Emergency Pipe Repair

No one wants to think about it, but a pipe can rupture at any time. Any time. If you’re very lucky, it’ll be during your local plumber’s business hours and they will be able to fit you into their schedule – after-hours or emergency calls almost always cost more than regularly scheduled appointments. So what are your options if you’re unlucky, and your pipes spring a leak at 2am on a weekend? One option is to attempt an emergency repair yourself. The following methods will hopefully provide a temporary repair to the leak, keep your water running, and allow you time to arrange for a plumber to come during business hours for a real fix.

First things first…

The first thing to do is shut off your water supply. Once this is done, turn on the faucet at the lowest point from the pipe to drain any remaining water, and relieve any pressure. Clean off the damaged area of pipe and wipe it dry.

Be extremely careful when handling the pipe, and when performing your short-term repairs – the pipe may be more damaged than it appears and could potentially collapse or break when handled.

Simple Short-Term Repair

For very small holes (“pinholes”), wrap electrical or duct tape around the pipe a few times, and keep it tight using hose clamps at both ends of the tape. This is a quick and very temporary fix – about long enough for you to get a hold of an emergency plumber. Depending on the hole and the condition of the pipe, it may look like this “fix” will hold up for a day or two – don’t let yourself be fooled! Repair the pipe posthaste.

If the hole is a bigger one or you have a leak at a fitting joint, epoxy putty is a versatile and easy way to plug it. Sold in almost any home improvement store (and on our site), it usually comes in a two-part “stick” form, and is activated by kneading the two component materials together. After the section of pipe has been cleaned and dried, put on a pair of gloves, break off a suitably-sized chunk of the epoxy, and prepare it. Work the putty into the hole and around it, using a putty knife if necessary to guarantee smooth coverage. Let the epoxy cure according to the manufacturer’s directions (usually under an hour). Once fully hardened, turn the water back on and check for leaks. Re-apply if necessary.

If you don’t have any epoxy lying around, or the store is closed, you can use hose clamps to effect a temporary fix. This simple technique uses hose clamps and a patch of rubber – an old bicycle inner tube will work, as will a length of old garden hose – to patch the hole and create enough pressure to keep it from bursting. All you need to do is cut a large enough piece of rubber/inner tube/garden hose to cover the hole and an area a few inches around it. Depending on the size of the hole, you may be able to seal it off using only one clamp, or you may need one around each end and in between as necessary. Although superior to using tape and clamps, this method is another that should not be tested for long.

Longer-Term Repair

The stopgap solutions mentioned above take advantage of items you may already have in your home. If you don’t have these things handy, or would like to have something designed specifically for long-term pipe repair among your supplies, we offer a few different easy-to-use repair kits that will set your mind at ease.

Utilizing special resin-permeated fiberglass tape, these repair kits make quick work of emergency pipe repairs. Fully cured between 40 and 90 minutes depending on the kit, all you need to do is prepare the pipe surface, activate the tape with water, and follow the application instructions. Within minutes, these kits create a permanent repair without the use of tools. Keeping a few of these in your arsenal can help stave off the potential debacle of a late weekend-night pipe emergency, and the cost of a professional repair!


Cracked Pipe Repair

Oftentimes you’ll find that the source of a broken, leaky pipe is just a small crack. Fixing a leaky pipe like this with SharkBite can save you the time and headaches.

Cracked pipes with a compromised section of two inches or less can be fixed with a SharkBite Slip Coupling. For any plumbing repair, first turn off the main water supply to the house. Then follow these steps:

Cut out the section of broken pipe completely clear of the crack. Make sure the cut is square–meaning that the plane of the cut forms a 90-degree angle with the pipe.

Deburr the pipe with the appropriate sized gauge. This creates a smooth surface to lie flush against the O-ring, which would otherwise be damaged.

If repairing a copper pipe or similar pipe without depth markers, be sure to mark the pipe for the appropriate depth of the fitting.

Push the end of the coupling marked “slip end” over the pipe as far as it will go.

Using a disconnect clip on the slip end of the fitting, slide the coupling over the adjoining piece of pipe to the depth that you marked

That’s it! No need for soldering or any messy materials; and remember, SharkBite can be installed wet or dry, no matter the circumstance. Want to find out how to fix a cracked pipe damaged because of freezing? This is it!


Things You Should Do When You Find a Burst Pipe

Shut off the Water

When water freezes, it expands in volume by about 9 percent. And it expands with tremendous force: The pressure inside pipes may go from 40 pounds per square inch to 40,000 psi! No pipe can hold that much pressure, so it breaks open. The break may occur where the ice forms, but more often, it occurs where water pressure finds a weak spot in the pipe. That may be inches or even feet from the frozen area. You might also need to shut off the electricity as well, depending on where the leaks occurs and how big it is.

Call a Plumber

Unless you feel comfortable trying to repair a broken pipe on your own, you’re probably going to need a plumber at some point. You can, however, do several things before calling the plumber that will help reduce the impact of a broken pipe.

Start Getting Rid of the Water

Grab the mop, buckets and a shop vacuum to start to get rid of the water because you certainly don’t want it soaking into everything else in the house. Plus, a quick clean up will reduce the chances of something getting moldy.

Turn up the Heat

Set up fans to blow heat into cold rooms. Keep the garage door closed. If you have reduced water flow, heat the most vulnerable pipes (usually in basements and crawl spaces or near exterior walls) with a hair dryer. Leave the faucet on while you apply heat. As you melt ice, the flow will increase.

Using The Best Electrical Maintenance

Using The Best Electrical Maintenance

What is Electrical Maintenance?

Advances in the design and quality of electrical components have made it possible for electrical systems to run for years without noticeable problems. While wonderful feats of engineering, well-designed electrical systems can lull building owners and operators into a false sense of security—right up until the moment the system fails. It’s for this reason, among others, that electrical maintenance is such an important part of commercial building operations.

What is Electrical Maintenance?

Electrical maintenance covers all aspects of testing, monitoring, fixing, and replacing elements of an electrical system. Usually performed by a licensed professional with a complete knowledge of the National Electric Code and local regulations, electrical maintenance covers areas as diverse as:

  • Digital communication
  • Electrical machines
  • Generators
  • Hydraulics
  • Lighting systems
  • Pneumatics
  • Surge protection
  • Transformers.

With an increased reliance on both data collection and machinery run by computer software, electrical maintenance is more vital than ever. The failure of a single component in the electrical system can cause extensive downtime or data loss.

Preventative Electrical Maintenance

Early identification of problems is a key aspect of electrical maintenance. For instance, should a back-up generator sit idle until needed, it may not start due to a number of factors. Old fuel clogging a fuel filter, uncharged starting batteries, or start switches left in the wrong mode can all prevent a smooth transition to backup power. These are basic problems, easily identified and addressed through preventative maintenance.

One of the major challenges to electrical maintenance is the nature of electrical wiring. It can be difficult to pinpoint the location of specific problems as the system is built into the building. Thermal imaging has become increasingly important in the industry for its ability to identify issues with both electrical connection points and equipment operation. By catching such problems early, electrical maintenance helps reduce unexpected power outages and protects equipment from damage.

What is electrical maintenance? It’s an aspect of building operations no commercial facility should be without. While large scale operations may have their own on-staff electricians, smaller facilities may find it more financially viable to contract with a licensed professional for scheduled electrical maintenance and servicing.


How Important is Electrical Equipment Maintenance?

Introduction

This article provides insight into the maintenance requirements for overcurrent protective devices and the potential impact on the arc flash incident energy when maintenance is not performed properly. Electrical preventive maintenance and testing is one of the most important functions to be performed in order to maintain the reliability and integrity of electrical distribution systems, as well as for the protection of equipment and personnel. However, preventive maintenance of electrical systems and equipment, specifically with regard to overcurrent protective devices is often overlooked, or is performed infrequently or inadequately. An unintentional time delay in the operation of a circuit breaker, due to a sticky operating mechanism, can cause the incident energy of an arc flash to rise, sometimes dramatically

The National Electrical Code (NEC) states that overcurrent protection for conductors and equipment is provided to open the circuit if the current reaches a value that will cause an excessive or dangerous temperature in conductors or conductor insulation. With regard to circuit breakers the only way to accomplish this is through proper maintenance and testing of these devices, per the manufacturer’s instructions.

MAINTENANCE AND TESTING CONSIDERATIONS

Specific maintenance and testing procedures will not be addressed in this article, however, there are three important steps that should be considered when addressing the maintenance and testing requirements for overcurrent protective devices.

  1. The first step in properly maintaining electrical equipment and overcurrent protective devices is to understand the requirements and recommendations for electrical equipment maintenance from various sources. Examples of sources include, but are not limited, to the Manufacturer’s Instructions, ANSI/NETA MTS , NFPA 70B , IEEE Std. 3007.2, NEMA AB-4 , and NFPA 70E .
  2. The second step is to provide adequate training and qualification for employees. NFPA 70E, Section 205.1 states: Employees who perform maintenance on electrical equipment and installations shall be qualified persons…and shall be trained in and familiar with, the specific maintenance procedures and tests required.

The Occupational Safety and Health Administration (OSHA), defines a qualified person as “One who has received training in and has demonstrated skills and knowledge in the construction and operation of electric equipment and installations and the hazards involved.” It is important that employees are properly trained and qualified to maintain electrical equipment in order to increase the equipment and system reliability, as well as enhance employee safety for all who work on, near, or interact with the equipment.

NFPA 70E states, with regard to electrical equipment maintenance :

  • Section 90.2(A), This standard addresses electrical safety-related work practices, safety-related maintenance requirements, and other administrative control for employee workplaces … In an informational note to paragraph 110.1(A) it explains that “administrative controls” include verification of proper maintenance and installation, alerting techniques, auditing requirements, and training requirements provided in the standard.
  • Section 110.1(B), Maintenance, was added to the 2015 edition of NFPA 70E to require the condition of maintenance as a part of the overall electrical safety program
  • Section 130.5 Arc Flash Risk Assessment – Take into consideration the design of the overcurrent protective device and its opening time, including its condition of maintenance
  • Section 205.3, Electrical equipment shall be maintained in accordance with manufacturers’ instructions or industry consensus standards to reduce the risk of failure and the subsequent exposure of employees to electrical hazards.
  • Section 205.4, Overcurrent protective devices shall be maintained in accordance with the manufacturers’ instructions or industry consensus standards. Maintenance, tests, and inspections shall be documented.
  • Section 225.3, Circuit breakers that interrupt faults approaching their ratings shall be inspected and tested in accordance with the manufacturers’ instructions.
  1. The third step is to have a written, effective Electrical Preventive Maintenance (EPM) program. NFPA 70B makes several very clear statements about an effective EPM program as follows :
  • Electrical equipment deterioration is normal, but equipment failure is not inevitable. As soon as new equipment is installed, a process of normal deterioration begins. Unchecked, the deterioration process can cause malfunction or an electrical failure. An effective EPM program identifies and recognizes these factors and provides measures for coping with them.
  • In addition to normal deterioration, there are other potential causes of equipment failure that can be detected and corrected through EPM. Among these are load changes or additions, circuit alterations, improperly set or improperly selected protective devices, and changing voltage conditions.
  • A well-administered EPM program will reduce accidents, save lives, and minimize costly breakdowns and unplanned shutdowns of production equipment.
  • NFPA 70E, Chapter 2, Safety-Related Maintenance Requirements – … these requirements identify only that maintenance directly associated with employee safety … it does not prescribe specific maintenance methods or testing procedures. It is left to the employer to choose from the various maintenance methods available to satisfy the requirements.

As noted in NFPA 70E, Chapter 2, the maintenance requirements are necessary for employee safety, but this chapter does not specify reliability issues, although properly maintaining equipment will have an impact on the reliability of the electrical equipment and systems.

IEEE Std 3007.2 states: In planning an electrical preventive maintenance (EPM) program, consideration must be given to the costs of safety, the costs associated with direct losses due to equipment damage, and the indirect costs associated with downtime or lost or inefficient production.

All maintenance and testing of electrical protective devices must be accomplished in accordance with the manufacturer’s instructions. In the absense of the manufacturer’s instructions, the latest edition of the ANSI/NETA MTS [2] is an excellent source of information for performing the required maintenance and testing of these devices. However, the manufacturer’s time-current curves would be valuable information for properly testing each overcurrent protective device.

ARC FLASH HAZARD CONSIDERATIONS

Maintenance and testing are essential to ensure proper protection of equipment and the safety of personnel. With regard to personnel protection, NFPA 70E requires an arc flash risk assessment be performed before anyone approaches exposed energized electrical conductors or circuit parts that have not been placed in an electrically safe work condition. NFPA 70E, Section 130.5 states that the arc flash risk assessment must take into consideration the design of the overcurrent protective device and it’s opening time, including its condition of maintenance.

All calculations for determining the incident energy of an arc flash require the arc clearing time of the overcurrent protective device. This clearing time is derived from the settings on the divice, along with the time-current curves. This information can also be obtained from a current engineering protective device coordination study, which is based on what the protective devices are supposed to do. If, for example, a low-voltage power circuit breaker has not been operated or maintained for several years and the lubrication had become sticky or hardened, the circuit breaker could take several additional cycles, seconds, minutes, or longer to clear a fault condition. This unintentional time delay could have catistrophic consequenses, due to the increase in incident energy, should an arc flash occur.

If the worker is protected based on what the circuit breaker is supposed to do and an unintentional time delay occurs, the worker could be seriously injured or killed because he/she was under protected. Maintenance is extremely important to an electrical safety program. Maintenance must be performed according to the manufacturer’s instructions, or industry consensus standard, in order to minimize the risk of having an unintentional time delay in the operation of the circuit protective devices.

CONCLUSION

In order to protect electrical equipment and personnel, proper electrical equipment preventive maintenance must be performed. The manufacturer’s instructions, or industry consensus standards, exist to assist users with electrical equipment maintenance and testing. When the overcurrent protective devices are properly maintained and tested for proper adjustments and operation, equipment damage and arc flash hazards can be limited as expected. Unfortunately many in industry think that just because the lights are on or the machines are running that everything is okay and that maintenance is not needed, because the circuit breaker is working just fine. No, the circuit breaker is not working, it is closed. Working is when an overload, ground-fault, or short-circuit occurs and the circuit breaker opens automatically in the time specified or when it is manually opened or closed. Maintenance of overcurrent protective devices is critical to electrical equipment and systems reliability, as well as for safety of personnel.


How to Build an Electrical Maintenance Program

Electrical control and distribution systems are generally complex and expensive assets that need to be effectively maintained so they operate at optimum performance over their serviceable life. It is common to find that there has been significant effort applied to managing mechanical assets, with less focus on electrical equipment.

There are many reasons as to why this is the case, but the reality is that the way asset management programs are developed should be applied equally to electrical and mechanical components of the asset.

How many of you can associate with the following situations?

  • Down days and shutdowns are not included as part of the production schedule.
  • There are few electrical tasks documented, and often the ones that are often were a “kneejerk” reaction to a one-off event.
  • Electrical maintenance spares are not kept in the store. Often, they are kept locked in cupboards and draws of individuals.
  • There are many mechanical maintenance planners, and few or no electrical planners.
  • There was no standard followed for electrical drawings and, hence, most modifications occurred with hand-drawn sketches at best.
  • Important technical information is not centrally located or managed.
  • There are few or no bills-of-material (BOMs) for electrical equipment.
  • Run-to-failure was the primary strategy for all electrical equipment.
  • There was no forward plan related to operational security of the equipment.
  • The CMMS is not effectively utilized to record failure history.
  • Many of the electricians are falling behind in their understanding of technology.

If you agreed with most of these comments, then you are working nearly 100 percent reactively and you have a lot of room for improvement.

But, where do you start? You can develop your own plan, tell people what they are now going to do and watch it all happen. Wrong! If you don’t manage the people side of the improvement, there is little hope of sustained improvement.

The People Issues

  • Acknowledge your current situation.
  • You have to believe that there is a better way of doing things. If many of the above points apply to you, then you need to know that your situation requires improvement.
  • Develop a vision for your electrical maintenance program.
  • The vision is where you want to be in the future. An example of such a vision:
  • An electrical planner will be employed within the next three months.
  • All critical equipment will have maintenance strategies developed within 12 months.
  • Strategies for less-critical equipment will be developed within 24 months.
  • A system for the upgrade and management of electrical drawings will be developed and implemented in the next 12 months.
  • All strategies will maximize the use of condition-based maintenance.
  • Tradesmen and other relevant personnel will be trained so they can effectively apply strategies.
  • Implement down days for electrical equipment.
  • Get the support from the electrical work group. Discuss your plans for the future with your work group. After all, they know the plant the best. Ask them for ideas to be included in the vision. It’s far better for the group to support the vision and have a feeling of ownership.
  • Gain support from your management. If management is not willing to support your vision, then there is little chance of success. Document your vision, highlighting the benefits and prospective gains, and your ideas! Be prepared for some hard questions and be confident to back your judgment.
  • The Practical Issues
  • Resources will be required to effectively implement changes. As part of your vision presented to management, it should have been made clear that resources are required to make significant improvements to your electrical maintenance program. This doesn’t necessarily mean you need more people. Redeploying internal labor or hiring contractors on a part-time basis usually makes more sense. As your program starts taking effect, the efficiency gains will offset the loss of labor on the floor.
  • Understand the criticality of your electrical assets. You could use a criticality-ranking tool for this, but if your assets have been around for some time, usually your employees will have a fairly clear understanding of this. The most critical assets will be your starting point.


Importance of Proper and Timely Electrical Maintenance

When regular electrical maintenance checks are carried out for a home, various unwelcomed mishaps associated with electricity get avoided in an opportune manner. When such mishaps are avoided, it makes it easy to escape unplanned and often very high expenses of repairing, or even replacing badly affected electrical devices due to small problems that would have otherwise been detected and dealt with earlier.

In terms of home safety, the proper and timely maintenance of key electrical components of a home ensures that safety is not only activated in multiple ways, but upheld as well. Below are four key points where proper and timely electrical maintenance translates directly to home safety:

  • Heating Ventilation and Air Conditioning (HVAC) In general, having your home’s HVAC system working well is a welcomed convenience. However, there are instances where the proper working of the HVAC could mean more than just a convenience. Take for instance, a home where there are senior citizens, small children or even a sick person; for such people, extreme heat variations, whether up or down on the thermometer, can result in life threatening complications.Such extreme heat variations would only happen in a malfunctioning HVAC system, and this is something that would have been avoided altogether through properly scheduled electrical maintenance of all its components in a timely manner like say, before the onset of winter or summer.
  • Outdoor Lighting The outdoor lighting in your home does a lot for your home safety. For one, it ensures that your porches and walkways are well lit and thus safe for both you and your guests at night. The other thing that they do for your home’s safety is deter thieves and burglars, who always prefer to operate in the dark. The light fixtures, bulbs and lines of your outdoor lighting require regular checks and replacements because of the nature of the outdoors. Having a contracted electrician carry out such checks on a regular basis will ensure that at no point will your outdoors be dark.
  • DIY Risks The urge to do things yourself when it comes to taking care of your home is always there, and often comes with a great feeling of satisfaction and fulfillment. Even as DIY comes off as good thing, there are those things that are advisably better left to the experts, and electrical repairs top that list. With a properly planned electrical maintenance schedule and a reliable contractor, you should never have the need to attempt to replace your old wiring or something like that, because that would be a dangerous thing to attempt a DIY on.
  • Fire Hazards A home fire can be very devastating to the homeowner, and that is to say the least since such fires can even result in the loss of lives. Electrical faults are one of the leading causes of fires in homes, and that almost always occurs as a result of problems associated with the wiring. Heat from the wiring can, over time, degrade their protective covering to a point where it gets completely broken down. When that happens, bare wires are left at the mercy of their getting in contact with each other, shorting and sparking up a fire right there within the walls of your home, or other areas where these lines run.There are normally signs that would, if noted, alert you when your wiring has become old and degraded. These include the constant tripping of breaker switches, those brown and discolored wall sockets or outlets, and the occasional electrical shocks that you get when plugging in an appliance or simply touching it while it is plugged in.

However, when you are at that point of being able to notice those signs, it often means that the problems with your wiring are at their extreme. The best thing is to have regular checks done by licensed electrical contractors to always be on the safe side.


Importance Of Electrical Installation And Maintenance

Proper installation and maintenance is very important in both commercial and residential facilities. A faulty wiring that is not immediately given attention can result into a greater danger such as fire and electrocution.

Hiring a qualified or certified electrician is crucial in proper installation and maintenance. Especially in complicated wiring, which may require top level skills, only certified electricians are able to keep the work clean and safe. Listed below are the importance of proper installation and maintenance for your home or business edifice.

Good installation and maintenance is equivalent to safety

A rule of thumb says that the worse it looks, the less likely the installation has been completed by a professional. When wirings are properly installed, wires are basically well tightened up and aligned in proper places. Some high voltage wirings are sealed in insulators to avoid accidents and unexpected electrocution. Professional electricians also follow a certain pattern or design in wiring to reflect good installations. For instance, high-voltage wires are usually hidden behind walls, which serve as their insulators. This keeps the place’s surroundings clean and arranged while people that are passing by are safe from potential injuries caused by faulty wiring.

Proper labeling saves money and time

Proper installations require clear labeling on wiring with tags, connection jacks, and other fixtures. Some wires also have different colors to determine their functions. When wires are in proper places, it would be easy for the electrician to determine which wire needs fixtures using color coding. The lesser time the electrician would spend for fixture, the lesser cost you would pay especially if the electrician charges per hour.

Proper maintenance paves the way for efficiency

Proper maintenance can be achieved by doing a regular system audit to check for the simplest fix faults, which may arise into bigger problems. This is very essential especially for quality control whether or not your business edifice is big. For further stage of quality control, proper maintenance can also be used for future installation needs.

During maintenance, listed below are some of the common issues that electricians usually watch out for:

  • Wiring problems which can be evident through smells of ozone or burning plastic
  • Damage or scratch marks on the surface of electrical connections
  • Previous history or constant issue on overheating appliances
  • Wires submerged on stock water in the basement or ceiling caused by leaking pipes or heavy rains
  • Flickering plugs or appliances
Home Cleaning With Move In Cleaning Metode

Home Cleaning With Move In Cleaning Metode

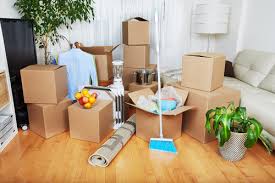
What to Clean Before You Move In

Your dream home sure looked spotless during the open house. But gird yourself: No matter how clean the place seemed, it’s likely there are some dirty surprises in store for move-in day.

Sanitizing the bathtub’s a good place to start (you bought someone else’s house, not their bath grime!), but don’t stop there. Before you unpack, buy some rubber gloves, stock up on your favorite cleaners, replace your vacuum’s HEPA filter and hunt down these not-always-obvious dirt hotspots that old homeowners often leave behind.

Heads up!

Step into the dining room and inspect the chandelier. If you find spider webs or dust, use a cleaning system that includes a soft microfiber cloth on an extendable, bendable handle to wipe that mess into submission.

The crown molding throughout the house may be gorgeous, but you should check to see whether dead bugs and dust lurk between the wall and the molding itself. A microfiber cloth or the nozzle attachment on your vacuum works well here. You’ll need a step ladder, of course.

Keep your chin up and check out the ceiling fans; clean the blades before they spin all that dust into the atmosphere. If you’re binge-cleaning at midnight and run out of clean microfiber cloths, remember: An old sock (worn on your hand) or dryer sheets double as dusters.

Hmm, what have we here?

Scan the main living areas of the house for unexpected cleaning projects. Did the former residents keep a sofa strategically placed over a huge scuff on the hardwood? Work your magic with cleaners designed to restore specific surfaces.

Did pets precede you? Don’t just clean the carpet — de-flea it (ideally before you move in). Wipe down the doors (knobs, too!), paying close attention to the lower half, where pets may have pawed or scratched.

The refrigerator vent is probably screaming for some cleaning, too. Don’t skip this one; the dusty buildup is a fire hazard. Vacuum away (bet you’re feeling good about that new HEPA filter now).

Inspect the dishwasher. Any gooey gunk in the food filter? Eww. Give it a good white-vinegar rinse, and deodorize the garbage disposal while you’re at it.

Appliances (sadly) don’t clean themselves.

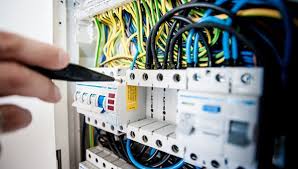
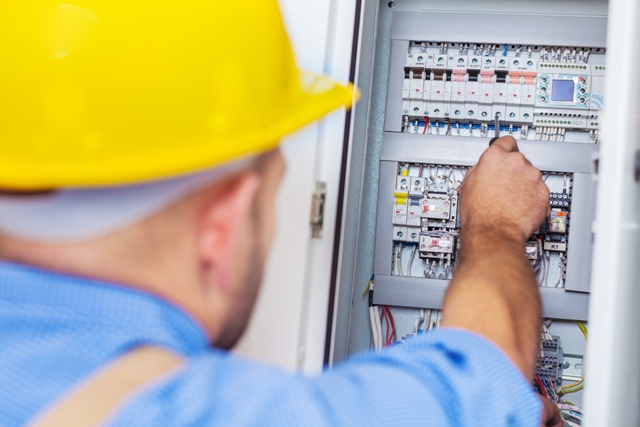
You didn’t peek inside the furnace during the inspection, did you? Clean or replace the filter, and if you feel comfortable doing so, clean the fan and blower assembly — or call in a pro: The expense may be offset by your energy savings.

Scheduling a professional cleaning for ductwork is a smart move. And now’s the time to replace air filters and clean out dusty water-heater closets.

Investigate the laundry area. Sterilize the washing machine (there are cleaner tablets for this job). Then, turn to the dryer and clean out the lint trap and its cavity; wipe it down with a damp cloth before replacing the trap.

It may take some elbow grease to get these messes out of your way, but you’ll be glad you did — then, you can entertain fearlessly when you throw your housewarming bash.


How To Deep Clean Your New House Before You Move In

House cleaning in a new-to-you home will seem like a breeze next to your everyday chores to keep a lived-in house clean and organized. There’s no bric-a-brac to dust around and no furniture to move. Just go room by room, and scrub everything down.

Hopefully, the previous owners left everything at least broom-swept. Just how much house cleaning you do will depend on whether the previous owners had pets or kids, and how clean is “clean enough” for you.

How to Clean Your New House

Some cleaning experts say they spend the most time cleaning their kitchen. Between refrigerators and stoves and cabinets, it’s no wonder! The following cleaning tips will make it easy.

Kitchen

Oven: Remove oven racks and place them in the sink filled with soapy water. If you’re using an oven cleaner, spray it first and let it sit while you clean the rest of the kitchen (except the floor, which should be last in every room). When you’re ready to proceed, scrub the oven down well. It’s safe to clean the racks with steel wool. You can also use a paste of baking soda and vinegar to get your oven clean without using chemicals.

Sink: It’s safe to use steel wool on stubborn stains in a stainless steel sink, or use a paste of baking soda and vinegar. After you’ve removed stains, a solution of water and lemon juice will really make the sink shine.

Cabinets: Dust and wipe down cabinets with a soft cloth all surfaces, inside and out. Don’t forget the tops of cabinet doors.

Countertops: Use a solution of 1 part water and 1 part vinegar to get countertops (except marble) squeaky clean.

Refrigerator: Pull the refrigerator away from the wall and vacuum or dust behind it. Clean the refrigerator inside and out: top, back, and sides. This will probably be the best cleaning your refrigerator gets, so take advantage of an empty, warm fridge to do the best job possible. Place removable racks and drawers in warm soapy water and scrub well.

Bathroom

A number of chemicals are available to clean your bathroom, but a paste of baking soda and vinegar also works well; it even dissolves soap scum. Use this on the tub and sink. Clean glass shower doors with 1 part vinegar and 1 part water in a spray bottle. Use undiluted vinegar in the toilet and scrub with a scrub brush. Some people like to replace the toilet seat in a new home.
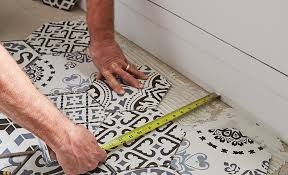
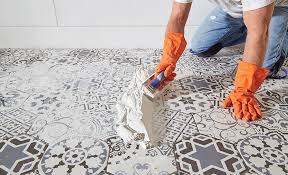
Floors

It pays to rent or purchase a steam cleaner, or hire someone to steam clean for you. Steam cleaning removes tough stains and provides a deep clean, even getting rid of pet odors.

You can also steam clean sealed hardwood floors if you have the right equipment. Do not steam clean hardwood floors that have not been sealed, as water could seep in and ruin the floor. Murphy’s Oil Soap also does a great job cleaning hardwoods.
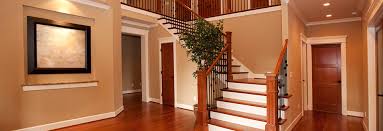
Walls

One thing you’ll probably never do again, unless you have young kids, is wash down the walls in your new home. But it pays to do it once, unless you plan on painting immediately.

Wash walls with a solution of water and vinegar, which is safe on most surfaces. Pay close attention to corners, where dirt and cobwebs collect, and areas up to about waist-level if the previous owner had kids.

Remove tough stains or crayon marks with a Magic Eraser-type product.
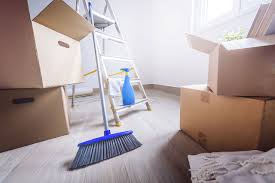
Move In Cleaning

When most people move, they’re so wrapped up with packing and move-out cleaning that they forget their future house or apartment needs to be cleaned, too. However, you want your new home to be comfortable and tidy, so it’s important to do some move-in cleaning before you unpack all your boxes.

The following move-in cleaning checklist can make settling into your new home a little easier.

1. Keep Cleaning Supplies HandyIt’s crucial that you’re able to find your cleaning products and tools when you arrive at your new home. Keep them separate from your other packing by putting them in your car rather than loading them on the moving truck. At the very least, make sure they’re in a clearly labeled box and are one of the first things you unload. Then, put them in a place where they won’t blend in with the rest of your boxes, such as under your kitchen sink or even in a bathtub. That way, when you’re ready to start your move-in cleaning, you know exactly where your supplies are.

2. Have a Game Plan

Move-in cleaning is much easier when you’ve decided which rooms you’ll address first. For the best results, clean one room at a time. Start with essential rooms, such as the bathroom, kitchen and main bedrooms. To make this easier, consider placing all your boxes in common areas, such as living rooms or dining rooms. That way, you can do a thorough cleaning job in your essential rooms without having to work around crates and piles of boxes.


Organize as You Unpack

Hopefully, you’ve already taken the time to dust and wash items before packing them away. Keep in mind that some things — like dishes — may need to be cleaned again before you use them. As you unpack your boxes, take the time to organize areas that are prone to chaos, such as closets, pantries, and so forth. When you do this up front, you don’t have to worry about coming back at a later date to more or less tackle the same chore again.

Enlist Some Help

Cleaning a new house before moving in can be a beast of a task, especially if you’re still working on move-out cleaning or have a tight squeeze in terms of move-out and move-in dates. If you’re looking to ease this stress, it’s not a bad idea to call in some reinforcement from friends and family members. Ask them to come over and help you in exchange for pizza and beer once the task is done, then put on some music and get to work. And don’t forget to return the favor when others need help moving.

Call in The Professionals

If you know you won’t be able to take care of move-in cleaning due to logistics or because you’ve relocated to a new city where you don’t have family and haven’t made friends yet, do yourself a solid and call for backup. The housekeeping professionals at Merry Maids offer a range of specialty services, including move-in and move-out cleaning. When you enlist their help, you can focus on loading and unloading that moving truck without having to worry about moving into a dirty home or losing a security deposit because you ran out of time.

It can be a challenge to take care of a move-in clean while packing and cleaning your old house or apartment. However, the time and effort will be well worth it once you get to kick your feet up and relax in your new home. And remember, if you need help with your move-in cleaning, give your local Merry Maids a call. They’re more than happy to lend a hand so that you can get settled in a little more quickly.


Moving in? Read Our Easy Move-In Cleaning Checklist

Start fresh in your new home by following our professional move-in cleaning checklist. Plus you’ll learn how to make your home chemical and allergen-free from the beginning, and get our top tips for preventing mess build-up in living areas and the kitchen.

Should you clean your house before moving?

Your place is brand new or freshly vacated, so it should be clean, right? Not necessarily. If the house has just been built a whole home clean is necessary to remove any remaining dust or chemical residue that comes with construction.

If you are moving into a previously occupied space, a whole house deep clean is even more crucial. Even if the move out requirements of the property include a move out clean, you can never be sure that the space was cleaned deeply to your standard.

This is particularly important for people with allergies and chemical sensitivities. You’ll want to be sure that your new home is free from any hidden dust build-ups, and if the space was cleaned, it could have been done using synthetic chemical cleaners that can aggravate allergies.The only way you can be sure that a fresh start in your new home is to your standard is to oversee the clean yourself.

How to clean a new bedroom

Cleaning bedrooms thoroughly before you move-into a new house is important as you’ll be exposed to any lingering allergens here when you sleep. As with all rooms, we would recommend working from top to bottom so you can easily keep track of what areas you have already cleaned and avoid transferring dirt to previously cleaned areas.

Pro tip: If there are multiple bedrooms in your new home, dust and clean them all and leave the floors until last. This way you can quickly move from room to room with the vacuum cleaner or mop without having to prepare your floor cleaning tools each time.

Cleaning a bathroom before you move-in

Old bathrooms can be problematic to clean if the previous tenants didn’t clean regularly. It’s a good idea to closely inspect your bathroom for mold, damp areas or damage (eg. holes in grout) before you move-in as it will be easier to address these issues while the bathroom is empty. It’s also worth remembering that conventional bathroom cleaning products tend to rely on harmful chemicals such as bleach to work. So it’s worth washing and wiping all surfaces with natural cleaners to remove toxic residues left by other cleaners.

Kitchen Cleaning in a New Home

Kitchens are sensitive rooms as the risk of exposure to toxins and irritants isn’t just by contact, but also by ingestion of things that our food is in contact with. Therefore, it is important for kitchens to be cleaned and prepared prior to daily use.

Pro-tip: After your kitchen has been washed and wiped, you should also put in preventative measures such as drawer and cupboard lining to help minimize future mess and cleaning.

Cleaning New Living and Common Areas

Thoroughly cleaning living rooms and dining rooms before bulky furniture is moved in will ensure you don’t cover up mess and leave dirt to fester.

It’s also a good idea to thoroughly clean hallways, entryways and landing areas as these can be easily forgotten. Starting with a deeply cleaned slate in common areas will help them stay clean for longer.

Cleaning Tools Needed for a Move-in Clean

Your move-in cleaning toolkit should include a HEPA vacuum cleaner; cleaning sprays for the kitchen, bathroom, glass and general surfaces; a scouring powder or concentrated cleaning liquid for tough cleaning challenges; floor cleaner; plenty of microfiber cleaning cloths (they are better than regular cloths at picking up dust and absorbing liquid); a microfiber mop; scrubbing brushes; a squeegee; and protective gear such as gloves.

To minimize risk to harmful chemicals during cleaning you should use natural cleaning products. A high-quality natural solution will work as well as (or even better than) conventional cleaners without using toxic synthetic chemicals.

Pro-tip: Baking soda is an inexpensive natural deodorizer. Have some on hand while you do your move-in clean in case you come across any smelly areas. Sprinkle baking soda over the affected area and leave it to absorb the smell while you clean or even until you move-in.

Hiring a Professional Move-in Cleaning Service

The sooner your new home is cleaned, the sooner you can Move-in and enjoy it. Hiring a professional move-in cleaning service will save you time and allow you to focus on other important tasks such as packing and paperwork.

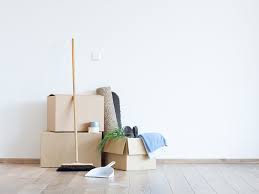
Moving Into a New House? Do These 7 Things First

There are some things you don’t want to forget to do before moving into a new house, like giving the place a good deep clean. Here’s a cleaning checklist to help guide you through the process, plus six other vital things to do before moving in.

Moving into a new home can be daunting. You are already changing so much and parting ways with a home where many memories were made.

The fun part of moving day is thinking about what should go where. But before you unload the moving truck and start arranging furniture, there are some important move in things to check off the list first. If you forget to do any of these before unpacking, you will likely regret ffit later.


Here are seven things to do before moving into a new house:

*Renters: This list applies to you, too! If you’re moving into an apartment, your landlord may have some of these steps covered. It’s best to check with them to make sure!

1. Double check the place.

Once the keys are in hand, head over to your new pad and check over all the rooms. Make sure everything that was agreed upon in the sale is still accounted for once you’re the new homeowner. You will want to be sure everything you expected to be there is still in the house.

2. Change the locks.

There is no way to know how many sets of keys to your house may be floating around. Give yourself peace of mind — hire a locksmith and have a set of new keys made.

3. Give your new house a deep clean.

While your new space may have had a cleaning prior to sale, you will still want to give it a good deep cleaning so it’s up to your standards. You never know what went down there before you moved in!

Not sure what to clean?

QUICK TIP: Pack a box of essentials and deliver that first to your new home. Fill it with cleaning supplies, paper towels and toilet paper along with the other essentials you’ll need to make it through moving day (lots of snacks, a set of clean sheets so you can sleep after a long day of unpacking, etc.).

Need help? Hire a pro to get your new house ready for moving day.

If you are trying to save some time on the unpacking process and you don’t want to worry about the deep cleaning yourself, hire someone to get to the grime for you. At least hire a professional company to clean your carpets and grout. There is no telling what may be hiding in those carpeted floors, especially if the previous owners were pet people.

Also, during the moving process, furniture may have shifted and scrunched your wall to wall.   Often times a professional company can stretch and clean carpets in one visit and give you a fresh, clean floor.

4. Change the toilet seats.

This may seem like a silly one, but the toilets are probably the grimiest spot in a house. Rather than spending your time cleaning them, remove them, clean under there and replace them with a brand new seat. You will have serious peace of mind, sitting on the brand new seats, knowing your family has christened them.
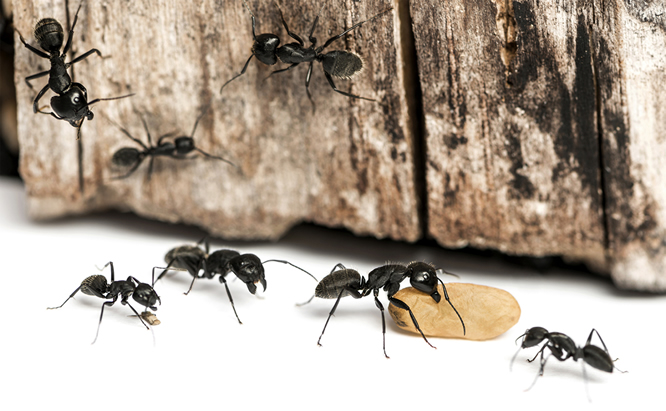
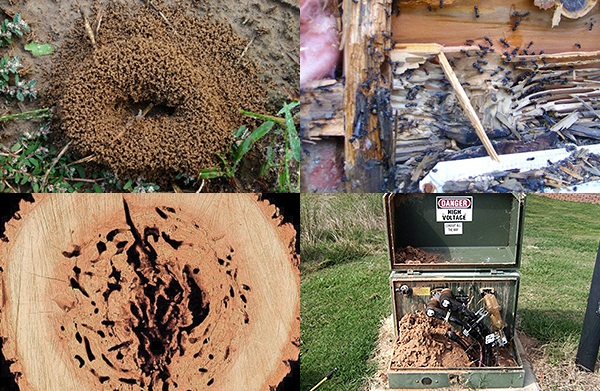
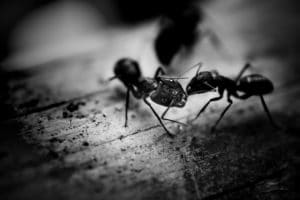
5. Pest control.

Make sure you and your family are the only ones moving into your new house. Hire an exterminator to come by and check for unwanted guests, plug holes for all pests and spray to deter any future uninvited home invaders.

6. Change your air filters.

Since you can’t be sure when they were last changed and you don’t want extra dust clouding up your newly cleaned home and carpets, it’s best to just start with fresh filters. Mark the date you installed them on the filter and your calendar so you can keep track and change them regularly.

7. Safety first!

While conducting that deep clean, take some time to make sure your home is safe. While in the laundry room, vacuum out that dryer vent. As you are clearing dust from walls and ceiling fans, change the batteries in your smoke detectors. When you clean out your kitchen cabinets, find a proper place to store a fire extinguisher.


Theme: Overlay by Kaira