Category: Flooring

How To Prevent Hardwood Flooring

How To Prevent Hardwood Flooring

How To Polish An Engineered Floor

One of the greatest things about engineered wood flooring, as well as its amazing visual appeal, is its hardwearing ability. This is, of course, provided you take care to maintain your engineered wood floor, which is why we’re here to help. If you’re thinking about polishing your engineered wood flooring then we’ve got the step by step guide to help you complete the task at hand without a hitch.

  1. Make space for polishing

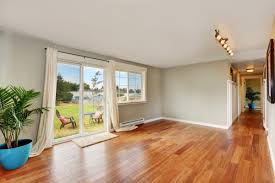
As with all big tasks that involve your floor-space, making sure you’ve cleared the room is key. Remove all the furniture if you can, as well as rugs and mats.

If you have anything that would typically hang on to your floor then we would recommend removing this from the room also. In the case of things like curtains, tie them up out of the way and leave them hanging up for the duration of the polishing process.

  1. Clean floor for polishing

Next, it’s time to prepare your floors before you begin polishing. Brushing, hoovering and mopping your floors is usually all you will need to do, but in ome cases, floors may be ingrained with dirt which it is essential you remove before beginning polishing. Make sure too get into every corner that you can, and don’t neglect to clean your skirting boards whilst you’re there!

For those floors that require a little extra TLC, a wood floor cleaner should be sufficient to help you lift up extra grime. If you’re in a rush to get ahead with your polishing then you can manually dry your floors after mopping them by using either a dry mop or cloth.

  1. Polish your floor

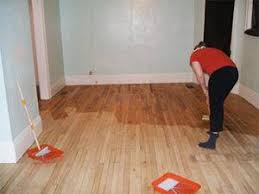
Now it’s time to actually begin the polishing process. We would advise starting at a corner first, and the furthest corner away from the door you will exit from. This means you can work steadily backwards and across the room until the last portion of the floor that requires polishing is the section directly in front of the door, which can be completed from outside the room.

The One-step Polishing Technique

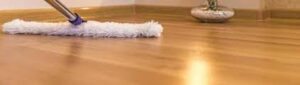
Coat your applicator in a small, hand-sized amount of polish and then work steadily in arms-length sections with a further amount of hand-sized polish. Allow a small amount of overlap between sections as you move to make sure there are no missed spots.

Once you’ve coated your entire floor the only tool you now need is patience! Check the manufacturer’s guidance on how long your polish will take to dry and leave it as long as you possibly can before walking on it, just to be safe.

The Two-Step Polishing Technique

Using the same starting point, apply the polish paste with a soft cloth to sections just over a metre in size. Once the waxed section of the floor has dried you will notice it turn white in colour, at which point it is suitable for buffing.

Using an electric floor buffer will be much easier – and much less exhausting! – than buffing by hand. Also, an electric floor buffer will keep the final look of your polished floor much more uniform in appearance.


Maintaining Your Wood Floors

Since wood is an organic material, that it will react to its environment. In humid environments, wood gains moisture and can swell. “In dry environments, wood loses moisture and can shrink.” If the environment changes, there will be changes in the floors themselves and how they perform.

For example, moisture can cause the floors to cup. This causes raised edges and lowered centers. On the other hand, if your floors lose moisture, they can gap or split. “This can occur between floorboards or on the face of the boards.”

If these gaps and splits occur but then go away during seasonal changes, he says there’s no reason for concern. “However, if the gaps in your floors are large or do not close during more humid months, it’s time to call a professional.”

Fortunately, there is a way to minimize these issues. “Keep your home between 60 and 80 degrees Fahrenheit and between 30 and 50 percent humidity year-round,” Miller advises. To do this, you’ll need to be sure your thermostat isn’t producing ghost readings and false numbers.


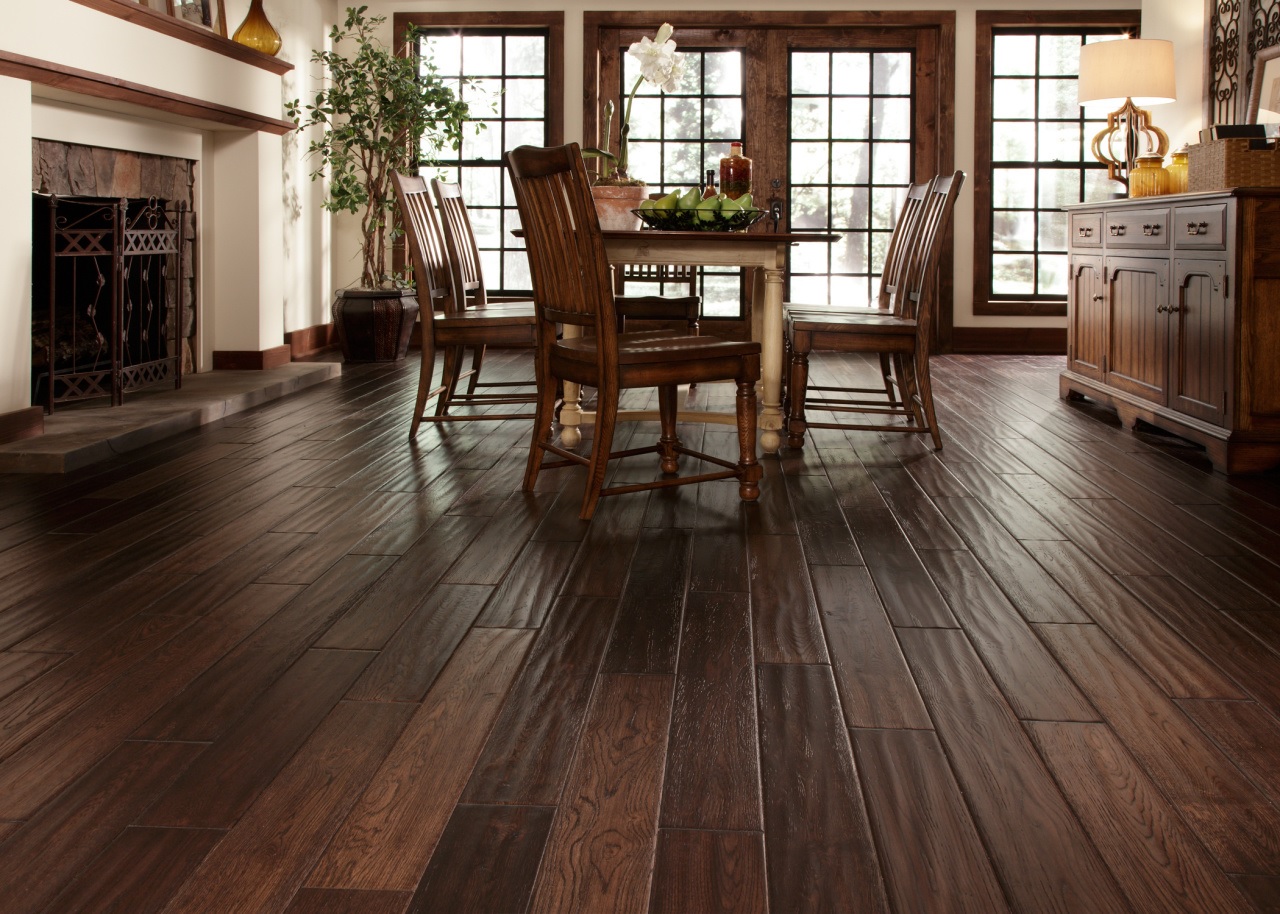
Proper Care And Maintenance For Walnut Hardwood Flooring

Walnut wood is a distinctive and durable flooring choice that provides a unique aesthetic for the home. It complements any style of design, offering a touch of warmth and luxury. Hardwood flooring even adds at least 2.5% more to the value of your home.

Installing walnut flooring makes quite a design statement but still needs proper maintenance. This will keep your floors functional and long-lasting for years to come. With the right tips and techniques, you can prolong your floor’s superior condition.

Follow this guide for the best ways to care for your walnut hardwood flooring.

Select the Right Flooring Contractor

This is the most important tip for having lustrous, long-lasting and well-maintained wood flooring. You’ll want to choose a skilled flooring contractor with satisfied customers and referrals. They should also specialize in installing walnut floor planks.

From here they can guide you in the different types of wood species best for your home project. As well as preferences on plank sizing and fabrication options.

Walnut wood flooring runs an average of $5 to $10 per square foot, not including installation. So be sure to factor this into your wood flooring costs. As you’re paying for high-quality products and installation techniques.

Installing wood floors is an investment that you want to be sure you are placing in the right hands. Many contractors also offer some type of warranty to stand by their quality of work.

A skilled flooring installer will also ensure there is perfect spacing between planks. This makes it easier for you to care for your wood floors and keep them in top shape. They may also recommend finishing options to increase longevity.

Use Rugs for More Than Style

Rugs are an excellent way to anchor furniture around a room. But this is not only for making a design statement. Adding rugs to a room will also protect the floor from heavy furniture.

This is helpful in rooms with high traffic areas, like living rooms and bedrooms. A play mat or rug also works well in a children’s playroom, to keep their toys from scratching the floor. You may also want to consider adding a runner in hallways and on the staircase.

Felt protectors can also work in furniture areas without rugs. These help to keep indentations from occurring in the wood.

Use smaller rugs or placemats for areas like below the kitchen sink to catch water splashes. This will also make it easier for learning how to clean hardwood floors in busy areas of the home.

These mats should be well ventilated as not to trap dirt or moisture beneath the back of the mat. Also, place welcome mats near entryways. These help trap dirt, and chemicals from outside, keeping them off your floors.

Adopt a Special Cleaning Routine

When maintained the right way, hardwood floors can last a lifetime. Begin your routine by sweeping or dusting daily. This will help keep dirt, dust, and debris from collecting on your floors.

You’ll also want to vacuum at least once per week. Be sure to use the vacuum’s hard floor mode or a floor brush attachment. Never use a breaker bar as this can cause damage to hardwood floors.

Cleaning often will help pull up any tiny dirt particles in the floorboards. As these can damage the finish on the floor over time.

Use a damp mop as needed, with a soft terry cloth head. A special cleaning mop is also the best way to clean hardwood floors. Bona is a great brand that gets recommended by professionals.

Their cleaning agents are safe to use on the hardwood. They don’t use harsh chemicals that can penetrate into the wood. Be sure to wipe up any extra moisture from the floor afterward.

Always clean up any spills right away. As liquids can cause water damage, or discolor or stain the floor. Don’t use a steam mop, as this can ruin the floor’s finish.

Keep a Healthy Living Environment

A healthy home will prolong the life of your wood floors and provide a safe environment for your family. Keep humidity levels no higher than 50% to maintain a balanced moisture level. As too much moisture can affect your floors, as well as cause mold growth.

It helps to open windows often to let in fresh air. Yet, be sure not to let too much sunlight in. As the UV rays can cause discoloration to your floors over time.

Consider designing a mudroom or entry area for your home. This is a place where the family can take their shoes off so they don’t track in germs, water, or driveway sealant. It’s also important to keep sports cleats and stiletto style heels off the floors.

If you have pets, keep their nails well trimmed so they don’t scratch the floor. Bathe and brush your pets often to keep fur and dander from accumulating on the floors.


Wood Floor Refinishing:

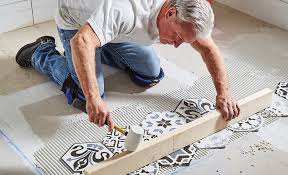
STEP 1: Remove Remaining Carpet

If there is any carpet or staples remaining on your floors, we carefully remove them with needle nose pliers and a putty knife. We use a chemical solvent that is safe for you and your family. We promise to take great care to not damage your original wood floors during this process.

STEP 2: Sand Your Hardwood Floors

We’ve made sure that our sanding method creates minimal dust and odor in your home. We begin with coarse grit sandpaper and repeat the process 3 times or more, using a finer grit each time. This ensures that all damage, scratches, and stains on your floors are completely removed. Our technicians will do a thorough job and will sand hard to reach places by hand where necessary. Once the sanding process is complete, your floors are ready to be stained.

STEP 3: Stain Your Hardwood Floors

Fabulous Floors has a large variety of stain colors for you to choose from. You can see our most frequently used stain colors here, however, if you don’t see a color you love, we can provide additional options. We apply the stain with the grain of the wood, making sure it’s applied evenly throughout your hardwood floors. We finish by buffing the floor and cleaning away any dust or debris with a tack cloth and vacuum.

STEP 4: Seal Your Hardwood Floors

Lastly, your hardwood floors are topped off with a high-quality & long-lasting polyurethane finish. We apply this coat with a mop-like tool and pad applicator. After 24 hours, your floors will be dry and ready for everyday traffic. This polyurethane finish will prevent future wear and damage, lock in your stain color, and make your hardwood floors shine for years to come! You can choose from gloss, semi-gloss and satin finishes for your floors.


Refining Treatment

BRUSHING

Brushing the surface highlights the natural structure of the grain and emphasizes the texture of the wood. Brushing effects vary, depending on the wood species. Brushes are made from different materials in varying levels of hardness, and brushing is often carried out along with other refining treatments such as staining and bevelling of edges.

STAINING

Staining further enhances the wood’s natural colour tones. It also allows us to apply new colours, thus completely transforming the appearance of the wood.

SMOKED

Smoking is an old technique used for treating wood floors, typically oak, to bring out darker shades, while the sapwood remains light. The colour can be different within the boards due to tanine concentrations.

You Don’t Have To Be An Expert To Choose Your Hardwood Flooring

You Don’t Have To Be An Expert To Choose Your Hardwood Flooring

Storing Your Hardwood Flooring

For the do-it-yourself crowd, there’s a difficult balance between what you want to do, getting the materials to do it, and finding time to do the work. When you buy hardwood flooring to install later, you can store the materials indefinitely. However, without a bit of preparation you could ruin the wood before it ever leaves the box.

BUT DON’T I NEED TO ACCLIMATIZE THE WOOD?

In the past, acclimatizing your wood by leaving it for days or even weeks in its new environment was standard practice; with earlier manufacturing processes, this actually helped the wood dry out. Modern hardwood flooring is often kiln dried, however; this means that when it’s boxed it’s ready to install, and should be installed as soon as possible. Ask about the specific recommendations for your hardwood product because details can change depending on the process and type of wood. Generally speaking, if you need to store your hardwood flooring for a period of time the wood should be exposed to as little change as possible from the warehouse.

HARDWOOD FLOORING STORAGE: WHAT COULD GO WRONG

The National Wood Flooring Association recommends keeping the humidity in your home between 30 and 50 percent, and the temperature between 15C and 24C (60F and 75F). These same guidelines apply to the location where you will be storing your hardwood. Most problems that you’ll encounter with hardwood flooring are related to water. Keeping your your wood away from leaks or potential flooding is pretty straightforward, but keeping it away from humidity requires a bit more planning. Everything from poor ventilation (i.e. in a crawl space) to washing and cleaning activities can add humidity to the air or even prevent moisture from evaporating.

Going back to the old argument for acclimatizing, working with wood that’s had time to absorb extra moisture can cause a variety of problems:

The planks could become warped. Each individual piece will react to moisture independently, which could cause difficulty when it’s time to install; the wood could, for example, expand on one end but remain the same on the other.

Every piece could expand slightly. Once installed, when the seasons change and the humidity drops, each plank will shrink back; this is what causes gapping.

Other damage could occur. Staining, splitting and cracks can derail your re flooring project before you even start

ONLY UNLOAD WHEN CONDITIONS ARE GOOD

When the weather is wet due to rain or snow, or if it’s particularly humid, avoid loading or unloading hardwood flooring. As noted above, any moisture can damage wood in different ways like changing its shape or developing cracks as it dries. However, wood that actually gets wet must be allowed to thoroughly dry out or it could also develop mold or mildew. If you manage to avoid damaging the wood outright, drying wet hardwood is a slow process that can take weeks.


Everything You Need to Know About Hardwood Floors

Hardwood floors are one of the most popular flooring choices because of their durability and timelessness. Not only do they look great, but who doesn’t love sliding across a polished hardwood floor in their socks from time to time? Hardwood floors can make a house feel like home.

Thinking about installing hardwood floors in your own home? You’ve come to the right place. Our guide to hardwood flooring will tell you everything you need to know about hardwood floors before you commit to a purchase. Also, we have licensed, bonded, and insured contractors to help you with your decision at any time.

Types of Boards

There are two main types of hardwood used to make hardwood floorboards: solid and engineered. Both types are made from 100% wood, but each has its own advantages and disadvantages.

Solid Hardwood

As you might have guessed, solid hardwood floors are made of solid wood. One board of solid hardwood is made from a single piece of wood. A solid hardwood board is typically about ¾ of an inch thick, but it can be sanded and refinished as often as needed. A solid hardwood floor is permanently affixed to a subfloor made of plywood or a similar material.

Engineered Hardwood

One board of engineered hardwood is made from several pieces of wood, typically three to five, which are bonded together into layers. The top layer of the engineered hardwood is usually hardwood with cheaper layers of plywood or other types of wood underneath. Engineered hardwood is cheaper and easier to install than solid hardwood.


Things You Can Do to Prevent Damaging Your Hardwood Floors

Chances are you have hardwood floors somewhere in your home. While they may seem durable and long-lasting, they will last better with proper care. Aside from sweeping, cleaning, and mopping, there are more ways you can protect those floors.

Have a welcome mat

With the front door being the heaviest traffic area, it is more prone to damage from the outdoors and weather conditions. Protect your flooring with rugs in areas around the house that receive the most foot traffic. Set up an entry mat or rug right at your entrance door to protect your hardwood floors from any dust, dirt, or grime.

Remove shoes when inside

The easiest way to take care of your hardwood floors is to remove your shoes at the entrance door. By not wearing shoes in the house you eliminate all the tracked-in dirt that can damage the wood floor’s finishing.

Clean messes right away

Spills happen, and when they do it’s important to clean them right away. Leaving liquids of any kind on a hardwood floor can cause the finish to dull over time, and leave a residue on the surface. For an effective clean, use a microfiber cloth to gently wipe the surface dry.

Polish the flooring

It’s important to give your hardwood floors some love and attention. Wipe down your floors when they start to look a little dull and it will go a long way. Pay close attention to the flooring and determine if the hardwood is covered in polyurethane or wax. For wax surfaces, use a cleaner that’s specified for wax-coated floors. For polyurethane flooring, try using good old fashioned vinegar and water to clean.


How to Care for Hardwood Floors

Taking proper care of hardwood floors is essential if you want them to last a long time. Routine cleaning is the key to protecting and maintaining your floor’s appearance. Particular cleaning protocols need to be followed to prevent damage to the floor’s surface. Aside from regular cleaning, damage can be minimized by observing a few maintenance and prevention measures. The longevity and durability of your hardwood floors can be preserved with routine cleaning and proper maintenance.

Cleaning Hardwood Floors

Dust every day with a microfiber mop or Swiffer. Microfiber cloths trap dirt, particles, pet hair and other household allergens with static electricity. Microfiber mop pads are more effective than sweeping with a broom. They’re also safer, since some broom bristles can scratch the floor’s surface.

Vacuum every week with a soft-bristled floor-brush attachment. Dust the floor with the microfiber mop before you begin. If you leave a lot of debris on the floor when you vacuum, this can scratch the floor’s surface. After using the microfiber pad, carefully vacuum the floor using a floor-brush attachment.

Damp-mop once per month with a hardwood floor cleaner. Use a damp flat mop with a microfiber head. Do not dampen it with water. Instead, mist the mop head lightly with a cleaner made specifically for hardwood. Use the minimum amount of cleaner required to get the floor clean.

Follow a regular cleaning routine to maintain your hardwood floors. Regular cleaning is the most effective thing you can do to keep your hardwood floors looking great and damage-free. Create a cleaning routine and stick to it. For best results, dust every day with a micro-fiber cloth. Vacuum biweekly with a soft-bristled floor-brush attachment. Damp-mop once per month with a hardwood floor cleaner


HELPFUL TIPS TO PROTECT YOUR HARDWOOD FLOORS THIS WINTER

There is no doubt about it, this winter has been one of the colder ones in recent memory, and while there are no doubt many things that need to be done around your home in order to keep your house in good shape this winter, it is important that you don’t forget about your floors when doing so. If you have hardwood floors in your home, you might be surprised to find out just how rough the winter months can be on them, and how easy it is for them to sustain damage in that time. Hardwood flooring is a major investment, and with the right care, it can be one that you and your family can continue to enjoy for many long years to come. In an effort to make sure that is the case, our team of professionals have taken the time to put together this short list going over a few helpful tips that might help you better care for your hardwood flooring this winter and keep it well protected going into the spring.

Use Protective Rugs & Covers

As anyone who has lived in the area for any length of time can tell you, during the winter months, the entryways of your home are going to get dirty. Between snow, dirt, and salt, there is going to be a wealth of that nasty slush that is going to be tracked into your home during the winter months as everyone comes and goes on a daily basis, and it can really take a toll on your hardwood floors over time if you aren’t careful. Salt in particular can leave behind a white residue that is highly abrasive and can scratch up your floors very badly. Using rugs and covers around these areas of your home will help to reduce how much of this is tracked in throughout your home, helping to spare your hardwood floors from the worst of it, as well as reducing the chances of slipping and falling.

Sweep & Clean Your Floors Regularly

As we stated above, there is no shortage of filth and debris that is going to be getting tracked into your home during the winter months, and one of the best defenses against these is just to make sure you are regularly sweeping and cleaning your floors to remove it. Puddles of water from melting snow and ice can be particularly destructive to your hardwood floors, and as such, it is important to make sure you clean them up immediately. After absorbing the moisture with a towel or cloth, it is a good idea to give your floors a good mopping to remove any abrasive debris that might still be in place before drying the floors once more. Be careful when mopping these areas, however, as if you have debris that gets mixed into the water, you could actually wind up causing damage.

Keep Your Home At The Right Temperature & Level Of Humidity

Lower temperatures and drier air can both be rough on your hardwood flooring. The lower temperatures of winter, combined with the drier air can actually cause your floorboards to shrink or otherwise warp out of shape. This makes it extremely important to ensure you are maintaining the right temperature in your home, but also the right level of humidity. As your boards shrink and dry out, it is very easy for them to warp out of shape, crack, or split, causing irreversible damage to the wood itself. Making sure that you are running your homes’ heating system will help to prevent much of this shrinking, and by running a humidifier in your home, you can ensure that your home has the right level of moisture in the air to keep your hardwood floors from drying out and becoming damaged.

Must Choose The Best Carpet Flooring For Your Livingroom

Must Choose The Best Carpet Flooring For Your Livingroom

tips for choosing carpet

A good-quality carpet takes a floor from workable to homely. It instantly transforms a space, softening the look of a room and absorbing noise to create a cosy environment. But choosing the best carpet for your home can be somewhat of a minefield, from pile types to colours – the options are seemingly endless.

CONSIDER THE WAY YOU LIVE

If you have a young family and pets then look for a hard-wearing carpet in a forgiving colour, such as a textured loop pile or a quality hard-twist cut. If you’re a couple looking for a touch of luxury, you might opt for a plush pile in a flat colour. If you’re an entertainer, a combination cut and loop pile in mid-to-dark tones or a stippled cut pile would suit

THINK ABOUT PLUSH PILES

Cut piles include plush piles, which are super soft and look like velvet. If you want that squishy, luxurious feeling then dense, plush-pile carpets are lovely, but bear in mind they show footprints.

TAKE A LOOK AT LOOP PILES

Loop piles are exactly that; the yarn is formed into loops. There are lots of variations: some have a formal, linear look, some have a ribbed pattern, giving them a sisal look. Random loop piles give the carpet a textured, casual look.

MIX IT UP

Combination cut and loop pile carpets, where the contrasting textures create a light and dark pattern are less likely to show footprints and have a lovely texture underfoot


Carpet Selection: Things You Must Know

Carpet dealers usually carry samples of many carpet lines from multiple mills and manufacturers in their showrooms. You’ll see a range of quality when you begin your carpet search. Your best bet is to educate yourself and research your options before you head to the store. Then, you’re sure to get a quality carpet that provides comfort, durability and beauty far into the future

What You Should Know:

By asking these questions, the dealer is trying to gauge which grade and style of carpet would work best for your home

Try to give a detailed picture of your expectations for the carpet. Is it important that the carpet stand up to pets, running children and bustling activity? Or are you mainly concerned about how it will look and feel in a formal living room that doesn’t get a lot of use?

How much use will the room get? (This is a consideration because a heavily used room may not be the best place to install white or very light-colored carpet.)

Are kids going to be playing down on the floor? Or is it a formal room that doesn’t get much use? (Again, lighter colors my create more maintenance but another factor the dealer is trying to consider is whether you should choose carpet made with BCF fiber so that children playing on the floor will not find themselves covered in loose fibers shed from staple products.)


Unbiased Carpet Buying Guide

A little background: It began as a project to help my father’s carpet cleaning customers when it came time for them to buy new carpet. He wanted a website to recommend to his customers when they were shopping for carpet, but all the sites we found either were incomplete or biased (trying to sell you a certain carpet, pad, or stain treatment).

So we decided to create our own site helping people buy carpet, and here it is. It’s been edited over the years to respond to our readers feedback, include new carpet technology, and just be more helpful.

Of course, this is all for free.  The site is supported by advertisements, and it can be assumed where there is a link to a product or service, I make a small commission. However, I only recommend products and services I believe in and apreciate your support. If you’d like to help out in any other way, I’m trying to get Pinterest off the ground, and more followers = more motivation.

Get estimated initial projects costs. You can start planning financing and budgeting. This step comes first because you need to know what you’re getting into financially. If you don’t, it will be difficult to determine what type of carpet you’ll need, when to buy, etc.

Plan the perfect carpet and pad for your home. This is the “meat and potatoes” of carpet shopping. You’ll learn what makes durable carpet and padding, and based on your home’s needs, what you’d be over-paying for. You’ll know what matters in carpet better than 90% of salesmen—and promise no sales pitch.


Wall-to-Wall Carpet Buying Guide

Buying the right type of carpet for a room in your home involves more than finding a style in the color you like. You first will need to consider your lifestyle—what you typically do in that room—location, material, construction, and upkeep. Carpet manufacturers have responded to homeowners’ desire for great looks, value, and easy maintenance with many innovations and options in recent years.

Selection

When shopping, think function first. Ask yourself a few questions when choosing your carpeting type

Answers to these questions will help you begin to determine the best fiber for your carpet as well as texture, construction, and even color.

Fiber Facts

The type of fiber used determines the basic performance and appearance of the carpet. The biggest trend today is: soft. Homeowners seek comfort, and carpet offers a cushion underfoot. It also suppresses noise. The fiber content is usually listed on a specification sheet on the back of the sample. While names may differ among manufacturers, products still fall within one of five basic categories.

Wool

Wool, the granddaddy of all soft floorcoverings, retains its legacy of luxury. Natural and made from woven construction, it offers a greater range of designs, detail, and color than a traditional tufted carpet. Expect good stain resistance as long as you treat it as soon as something is dropped on it. It also has inherent flame retardant characteristics


Carpet Buying Guide

How to Choose the Best Type of Carpet for Your Home

Carpets are part of what makes a home truly feel like a home. The flooring of a house says a lot about it. The right balance seems to give each space that cozy, comfortable feeling. When you are building or remodeling your home, your flooring choices can easily become overwhelming. You have to consider things like allergies, pets, your family and which rooms get the most traffic. As you browse, how do you know which material or style of carpet is right? This guide covers several factors you should consider to help you make the best choice

What Are Piles?

Piles describe how manufacturers use the fibers to make the carpet. The yarn is usually looped or cut to a certain length and twisted to stay in place. There are several pile styles with different textures. Some will hide dirt more easily, while others track and wear down quickly. When you choose one for your home, consider the amount of traffic and how you plan to use the room.

Cut Pile

A cut pile carpet has straight strands that are cut and twisted. It tends to be fairly soft, which means you can see marks such as footprints and vacuum streaks.

Low Pile Carpet

The height affects the wear, appearance and feel of the material. A short pile carpet has yarn cut to 0.25” or less.

Plush Carpet

The plush style is trimmed off so that yarn ends poke up. Saxony plush, one of the most popular varieties, has short tufts that are densely packed to look like a thick carpet. It doesn’t tend to wear as well as loops.

Find The Way To Make Tile Flooring

Find The Way To Make Tile Flooring

How Long Does It Take To Install Tile Floors?

How long it takes to install a tile floor depends on several things, including the skill level of the worker, the material and the size of the room. According to experts, it takes a beginner about 16 hours to lay ceramic or stone tiles in an average room. A person with intermediate skills takes about 12 hours and experts, such as our Lewisville professionals at Pro Flooring, take about 10. This doesn’t even add in the hours it takes to prepare a subfloor, which takes a pro about 4 hours.

The right way to buy tiles is to measure the area of the floor, and add about 10 percent to the number to allow for the inevitable broken tiles. Also, we tell our customers to make sure that all of the tiles have the same dye lot number, if that’s appropriate.


Subfloor vs. Underlayment

It is important to distinguish the components of a flooring system in order to understand the best installation practices for ceramic tile. Except for slab floors, any flooring system consists of three primary components: the joists or structural support component; the subfloor, which is usually a layer of OSB (oriented strand board) or plywood; and the underlayment, a final layer that lies just beneath the surface flooring and which is selected to match the needs of the flooring material. Not every floor has all three components. In a home with a concrete slab foundation, or in basements, ceramic tile is often installed directly over the concrete slab.

In any flooring installation, but for ceramic tile in particular, the success of the flooring depends largely on the quality of the underlying support system. There are six subfloor/underlayment structures that are widely accepted for ceramic tile floors.


Tiling Challenges

  • Dry thinset mortar is cheap, but it is also difficult to mix. The solution is to buy pre-mixed mortar. While significantly more expensive, pre-mixed thinset saves you from the aggravation of getting water-to-thinset measurements correct. Plus, mixing up dry thinset is physically difficult.
  • Your tile work is only as good as your substrate or subfloor. If you do not have a good subfloor, your tile will not lie flat. Lippage will occur—adjoining tile edges that are not the same height. Even worse, a base floor that is not solid enough will eventually cause the tile to crack.
  • Perimeter tiles will need to be cut. You can use either a wet tile saw or what is often colloquially called a snap tile cutter for this. More likely, you will want to use both types of tile-cutting tools. If you happen to have any bad cuts, you can position them so that the ragged cut falls under a baseboard or under a cabinet toe kick overhang.
  • Even tiles within the perimeter can be difficult. They do not automatically fall into straight lines: you need to impose this.
  • Laying tiles on a diagonal. Diagonal tile cutting can be a frustrating experience for the novice tiler.
  • Spacing tiles correctly is hard. Be sure to use plastic tile spacers to impose the correct distance. While spacers are a pain to remove, they ensure perfect spacing of tile seams.
  • Constantly being on your knees on a hard surface can affect the quality of your work. For this reason alone it is worth purchasing an inexpensive pair of tiler’s knee pads.


How to prepare a plywood subfloor

Measure the space and cut cement backer board to fit. Adhere the backer board to the plywood with thinset adhesive, leaving a 1/8” gap between the sheets, and a 1/4” gap around the edges of the room. Make sure the seams of the backer board don’t align with the seams of the wood subfloor.

Next, fasten the backer board to the floor with screws spaced six to eight inches apart. Set the screw heads beneath the surface of the board to ensure that it’s completely level.

Use glass fiber tape specifically made for backer board to reinforce the joints. If the tape is non-adhesive, fill the gaps between the boards with mortar before applying the tape. Finally, cover the tape with a thin layer of mortar and allow it to dry completely before proceeding.


Why are tiles soaked in water before use?

Soaking the tiles isn’t always what you want to do. If you are using an epoxy or some other kind of mastic adhesive, soaking the tile will just weaken the adherence. However, if you are using Portland cement based mud-set or thin-set mortar, and your tile is stone or unglazed ceramic, then by soaking the tile, you ensure that it doesn’t weaken the join between itself and the cement by pulling water from the cement.

Theme: Overlay by Kaira