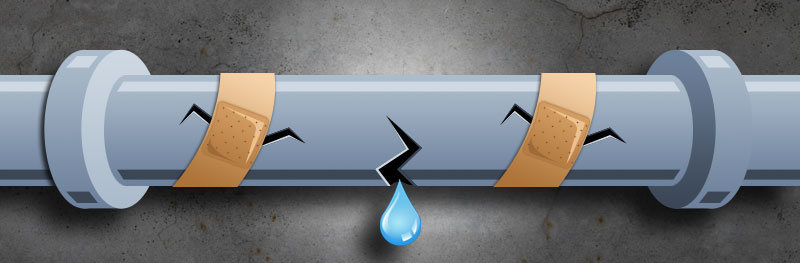
How to Fix a Broken Pipe
Turn off the relevant supply valve if it’s a water supply leak. If you have a water supply leak, which is a leak in the piping from the water supply outside your home to a particular region of your house, turn off the closest valve. For example, if the leak is in the supply piping extending to your washroom, turn the washroom water supply valve clockwise to turn it off.
Turn off the sprinkler valve if the leak is in the sprinkler pipe. If your home has a fire sprinkler system, be sure to turn the sprinkler valve off. The sprinkler valve is located right before the primary water supply valve, which is the second valve downstream from the sprinkler system.
Drain the affected water line if it’s a water supply leak. Turn on any taps connected to the problematic water supply piping and drain them. For example, if your affected piping is in the washroom water supply piping, turn on the washroom faucet and let it run until no water comes out.
Locate water leaks in your wall. If your leak is located in water supply piping in your wall, you have to open it up. Score a line 10 inches (25 cm) long into the wall where you see signs of a leak. Now, cut along the scored line with a drywall saw and create a hole big enough to peek inside. Once you spot the source of the leak, make the hole bigger until you can access it.
Remove the damaged piping 1 inch (2.5 cm) from each side of the leak. Start by marking the locations to be cut on each side of the leak using a measuring tape and permanent marker. Now, wrap pipe cutter blade jaws around the first mark and grip the handles firmly. Tighten the screw on the cutters while at the same time rotating them clockwise. Continue doing this until the pipe breaks off.
Cut a repair sleeve 1 inch (2.5 cm) longer than the damaged pipe. A repair sleeve is the new piping—cut from the longer repair coupling—that connects the two exposed pieces of piping. To determine the length of the sleeve, measure the length of the damaged piece of piping and add 1 inch (2.5 cm). Now, mark this amount on a repair coupling from one of its ends using a permanent marker. Using your pipe cutter, grip the marked section firmly and turn the screw while rotating the cutter clockwise.
How to Fix Water Pipe Leaks & Problems
How to repair water supply pipes, including burst or leaking pipes, noisy or frozen pipes, including information on how to locate underground pipe leaks
Water leaks and broken pipes can be a big problem for any homeowner. Because water in supply pipes is under pressure (normally about 50 pounds per square inch), if a pipe or fitting springs a leak, the water usually sprays out with considerable force.
Because of this pressure, it’s usually pretty obvious if a pipe is leaking—even if the pipe is inside a wall or above a ceiling. You can often hear water spraying inside the wall or ceiling. The drywall becomes wet, particularly at the joints between panels. And water often pools at the base.
If water is staining the ceiling or dripping, the leak may be directly above, although water can travel along a joist or other interior framing member and stain a wall or ceiling some distance from the leak itself. If there are no stains or drips overhead as evidence, grab a flashlight and check the pipes in the basement or crawlspace.
Most modern home water supply pipes are copper, soldered together with elbows, tees, and other fittings. Threaded galvanized iron pipes are also common, particularly in older homes, but are being phased out because they tend to get clogged by mineral deposits over time.
It always helps to have at least one pipe repair clamp on hand just in case a pipe bursts—especially if you live in a climate where pipes are likely to freeze. You can buy these quick-repair screw-on devices at any home improvement store or online.
Temporary Emergency Pipe Repair
No one wants to think about it, but a pipe can rupture at any time. Any time. If you’re very lucky, it’ll be during your local plumber’s business hours and they will be able to fit you into their schedule – after-hours or emergency calls almost always cost more than regularly scheduled appointments. So what are your options if you’re unlucky, and your pipes spring a leak at 2am on a weekend? One option is to attempt an emergency repair yourself. The following methods will hopefully provide a temporary repair to the leak, keep your water running, and allow you time to arrange for a plumber to come during business hours for a real fix.
First things first…
The first thing to do is shut off your water supply. Once this is done, turn on the faucet at the lowest point from the pipe to drain any remaining water, and relieve any pressure. Clean off the damaged area of pipe and wipe it dry.
Be extremely careful when handling the pipe, and when performing your short-term repairs – the pipe may be more damaged than it appears and could potentially collapse or break when handled.
Simple Short-Term Repair
For very small holes (“pinholes”), wrap electrical or duct tape around the pipe a few times, and keep it tight using hose clamps at both ends of the tape. This is a quick and very temporary fix – about long enough for you to get a hold of an emergency plumber. Depending on the hole and the condition of the pipe, it may look like this “fix” will hold up for a day or two – don’t let yourself be fooled! Repair the pipe posthaste.
If the hole is a bigger one or you have a leak at a fitting joint, epoxy putty is a versatile and easy way to plug it. Sold in almost any home improvement store (and on our site), it usually comes in a two-part “stick” form, and is activated by kneading the two component materials together. After the section of pipe has been cleaned and dried, put on a pair of gloves, break off a suitably-sized chunk of the epoxy, and prepare it. Work the putty into the hole and around it, using a putty knife if necessary to guarantee smooth coverage. Let the epoxy cure according to the manufacturer’s directions (usually under an hour). Once fully hardened, turn the water back on and check for leaks. Re-apply if necessary.
If you don’t have any epoxy lying around, or the store is closed, you can use hose clamps to effect a temporary fix. This simple technique uses hose clamps and a patch of rubber – an old bicycle inner tube will work, as will a length of old garden hose – to patch the hole and create enough pressure to keep it from bursting. All you need to do is cut a large enough piece of rubber/inner tube/garden hose to cover the hole and an area a few inches around it. Depending on the size of the hole, you may be able to seal it off using only one clamp, or you may need one around each end and in between as necessary. Although superior to using tape and clamps, this method is another that should not be tested for long.
Longer-Term Repair
The stopgap solutions mentioned above take advantage of items you may already have in your home. If you don’t have these things handy, or would like to have something designed specifically for long-term pipe repair among your supplies, we offer a few different easy-to-use repair kits that will set your mind at ease.
Utilizing special resin-permeated fiberglass tape, these repair kits make quick work of emergency pipe repairs. Fully cured between 40 and 90 minutes depending on the kit, all you need to do is prepare the pipe surface, activate the tape with water, and follow the application instructions. Within minutes, these kits create a permanent repair without the use of tools. Keeping a few of these in your arsenal can help stave off the potential debacle of a late weekend-night pipe emergency, and the cost of a professional repair!
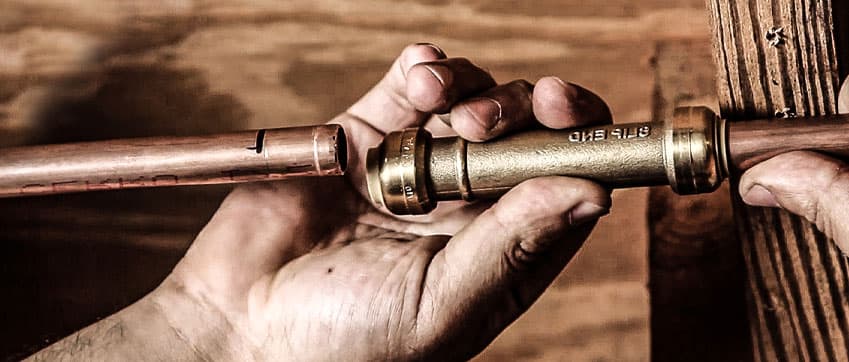
Cracked Pipe Repair
Oftentimes you’ll find that the source of a broken, leaky pipe is just a small crack. Fixing a leaky pipe like this with SharkBite can save you the time and headaches.
Cracked pipes with a compromised section of two inches or less can be fixed with a SharkBite Slip Coupling. For any plumbing repair, first turn off the main water supply to the house. Then follow these steps:
Cut out the section of broken pipe completely clear of the crack. Make sure the cut is square–meaning that the plane of the cut forms a 90-degree angle with the pipe.
Deburr the pipe with the appropriate sized gauge. This creates a smooth surface to lie flush against the O-ring, which would otherwise be damaged.
If repairing a copper pipe or similar pipe without depth markers, be sure to mark the pipe for the appropriate depth of the fitting.
Push the end of the coupling marked “slip end” over the pipe as far as it will go.
Using a disconnect clip on the slip end of the fitting, slide the coupling over the adjoining piece of pipe to the depth that you marked
That’s it! No need for soldering or any messy materials; and remember, SharkBite can be installed wet or dry, no matter the circumstance. Want to find out how to fix a cracked pipe damaged because of freezing? This is it!
Things You Should Do When You Find a Burst Pipe
Shut off the Water
When water freezes, it expands in volume by about 9 percent. And it expands with tremendous force: The pressure inside pipes may go from 40 pounds per square inch to 40,000 psi! No pipe can hold that much pressure, so it breaks open. The break may occur where the ice forms, but more often, it occurs where water pressure finds a weak spot in the pipe. That may be inches or even feet from the frozen area. You might also need to shut off the electricity as well, depending on where the leaks occurs and how big it is.
Call a Plumber
Unless you feel comfortable trying to repair a broken pipe on your own, you’re probably going to need a plumber at some point. You can, however, do several things before calling the plumber that will help reduce the impact of a broken pipe.
Start Getting Rid of the Water
Grab the mop, buckets and a shop vacuum to start to get rid of the water because you certainly don’t want it soaking into everything else in the house. Plus, a quick clean up will reduce the chances of something getting moldy.
Turn up the Heat
Set up fans to blow heat into cold rooms. Keep the garage door closed. If you have reduced water flow, heat the most vulnerable pipes (usually in basements and crawl spaces or near exterior walls) with a hair dryer. Leave the faucet on while you apply heat. As you melt ice, the flow will increase.